Photography Terms Glossary
Whether you’re new to photography or just looking to find the meaning of a particular photography term you’re unclear on, this glossary covers some of the most popular and commonly used terms used by photographers, providing an in-depth definition and resources you can follow to learn more about that specific topic.
To quickly find the term you’re looking for, use the links below to “jump” to the following letter:
A | B | C | D | E | F | G | H | I | J | K | L | M | N | O | P | Q | R | S | T | U | V | W | X | Y | Z
Aperture
You can simply refer to aperture as the size of the lens opening. Think about it, much like a window; the larger the window, the more light it will let in. The same goes for a camera lens, the wider the opening, the more light it will let in, resulting in a brighter photograph and vice versa.
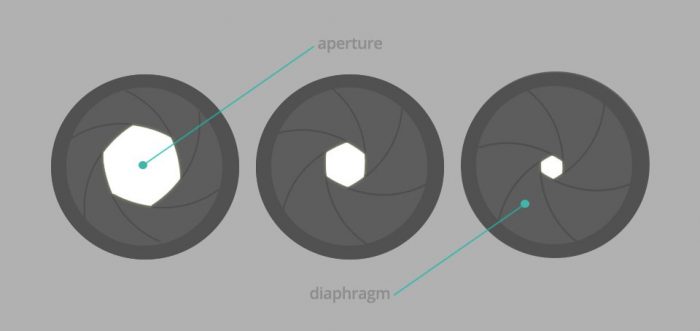
Image via B&H Photo Video
Aperture is measured using f-stops, which is a measure of the diameter of the lens opening. The larger the reading, the narrower the aperture. For instance, f/1.8 is wider than f/22. If you want a narrow focus resulting in a crisper image, you should use a higher f-stop (ex. f/8, f/11, f/22, etc.). A lower f-stop will let in more light, which can be useful in low-light situations or night photography.
Typical cameras lenses will have a minimum and maximum aperture of f/1.8 and f/22. The more expensive types of cameras will have a maximum of f/1.4 or larger. You will find such cameras very useful where the light conditions are low.
Recommended Resources:
- “Aperture in Photography Defined” – B&H Photo
- “Understanding Aperture in Photography” – Photography Life
- “The Ultimate Guide to Learning Photography: What Is Aperture?” – Creative Live
Aspect ratio
The aspect ratio is the ratio of the height to the width. The camera sensors will determine the dimensions, but you can alter them in post-processing or in your camera settings. The typical ratio is 3:2 and 4:3.

Image via Expert Photography
If you are, for example, taking pictures for Instagram, you will go with 4:5 due to the multiple cropping. Many modern digital cameras will give you the option of 4:3, 3:2, or 16:9.
Recommended Resources:
- “Aspect Ratio: Why It’s Important in Photography” – Pretty Presets
- “A Beginner’s Guide to Aspect Ratio” – Canva
- “How Do Aspect Ratios Affect Your Photographs?” – Expert Photography
Button Focus
You probably already know that when you half-press the shutter button, your camera will autofocus. However, in some situations, you will want to take a photograph without the autofocus function. You can use back button focus in this scenario:
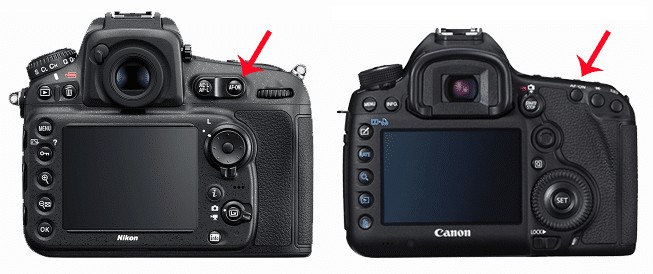
Image via ApogeePhoto
You can find the button on the back of your camera and will use it to focus on the image you want to photograph. You must, however, first disable the out-of-focus from the shutter button.
Depending on the specific camera you have, it will come as default on the AF-On button. Many professionals actually prefer to use the back-button focus rather than to rely on the autofocus.
Recommended Resources:
- “Back Button Focus Settings” – Melissa Kill
- “Back Button Focus Will Change The Way You Use Your Camera” – Creative Life
- “Improve Your Focus Using the Back Button Focus” – Apogee Photo
Bokeh
Bokeh refers to the rendering or visual quality of the out-of-focus areas in an image. It’s often an aesthetic quality that photographers aim for, and you can typically increase the amount of bokeh when zooming in on a subject using a zoom-lens.
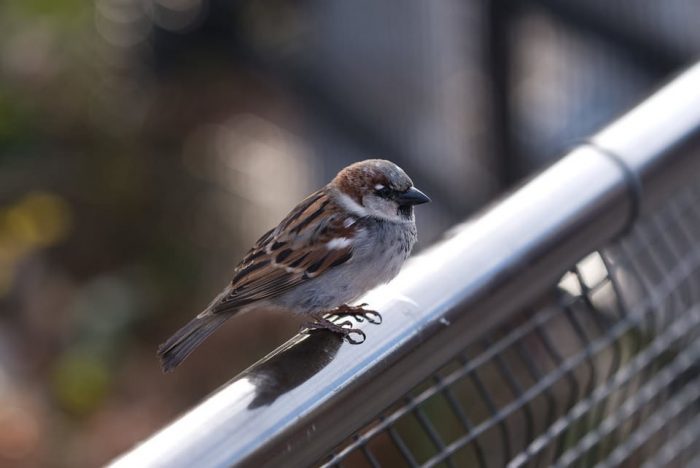
Image via Photography Life
Recommended Resources:
- “How to Create Bokeh” – Nikon
- “Step by Step Guide to Beautiful Bokeh” – Expert Photography
- “The Ultimate Guide to Bokeh” – fStoppers
Bracketing
Bracketing refers to the situation where you take a series of pictures in a sequence but with some variations. For example, you could use different shutter speeds to take multiple images with varying levels of brightness, which is known as exposure bracketing.
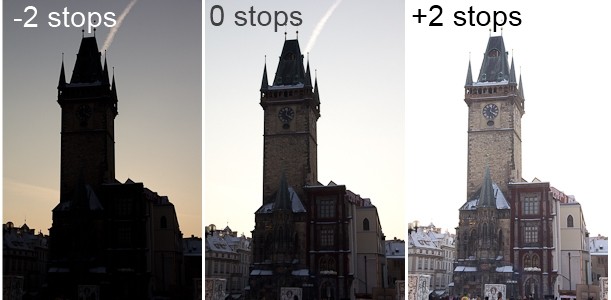
Image via We Are So Photo
Most cameras have a bracketing menu that will allow you to capture bracketed pictures in a row automatically.
In focus bracketing, your aim is to shoot sequential images at different distances. Some of the settings for bracketing include ⅓, ½, and full-stop increments. The advantage of bracketing is that you ensure that you capture the image in the right exposure.
Recommended Resources:
- “Bracketing Explained: What You Need to Know About Maximizing Detail” – TechRadar
- “Bracketing – What Is It and What to do with the Images?” – Digital Photography School
- “When to Use Bracketing for the Best Results” – Photography Life
Burst Mode
With burst mode, you can continue snapping photos as long as you hold down the button. However, you can only continue to take pictures until the buffer is full. The speed will depend on the type of camera you have and is measured in with the frames-per-second (FPS). For example, 6 FPS would mean you can snap 6 images per second.
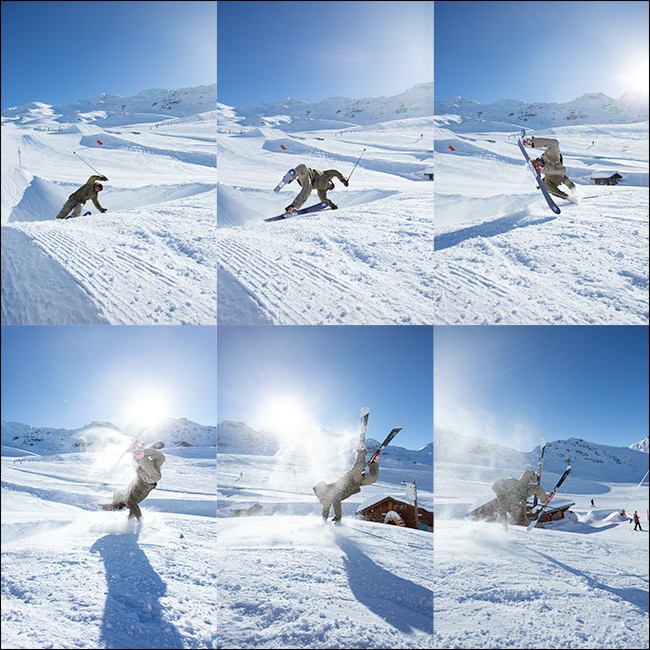
Image via How-To Geeks
Burst mode can be a great option for capturing quick moving objects, making it perfect for nature or sports photography.
Recommended Resources:
- “Burst Mode: What It Is and How to Use It” – Lifewire
- “How To Use Burst Mode for Perfectly-Timed Shots” – Expert Photography
- “Shooting in Burst Mode” – Digital Photo Secrets
Candid
Candid photography is when you take a picture without the subject posing for it. You will find many photographers using candid portraits for social occasions such as weddings, events, and birthdays.
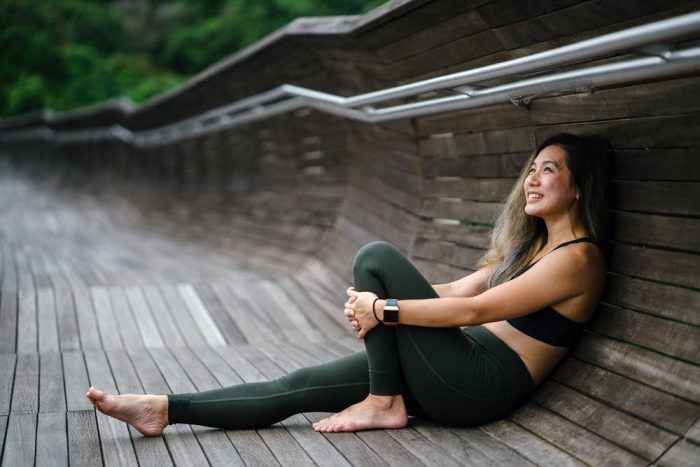
Image via Pexels
Recommended Resources:
- “What is Candid Photography?” – Photography Talk
- “11 Tips for Better Candid Photography” – Digital Photography
- “10 Tips for Becoming a Candid Photography Pro” – Expert Photography
Card Reader
A card reader is a device that will allow you to transfer data from your camera memory card to your external storage on your computer or external hard drive.
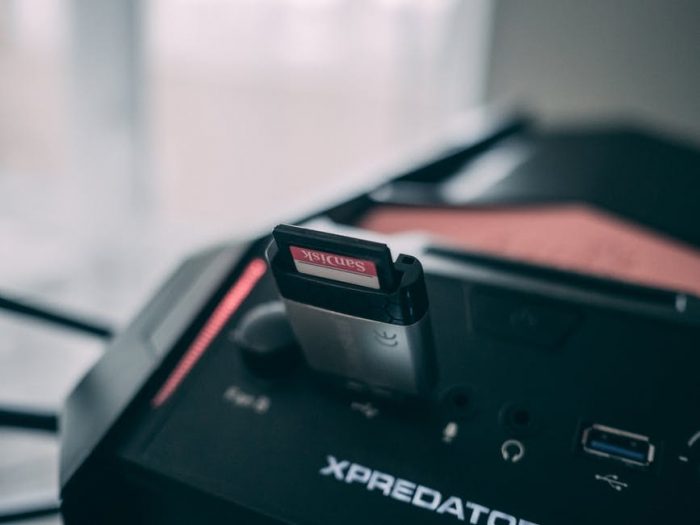
Image via Pexels
Recommended Resources:
- “The Best Memory Card Readers on the Market” – Popular Photography
- “The Best Memory Card Readers: Get Your Images on to Your Computer the Easy Way” -Digital Camera World
- “The Best Memory Card Readers for Photography and Video” – Shutterstock
Chimping
You may have observed some photographers constantly check the camera display every time they take a single shot. It is especially prevalent among beginners. This act is sometimes referred to as “chimping” because photographers will look at their camera while saying “Ooh, ooh, ooh!” like a chimpanzee.
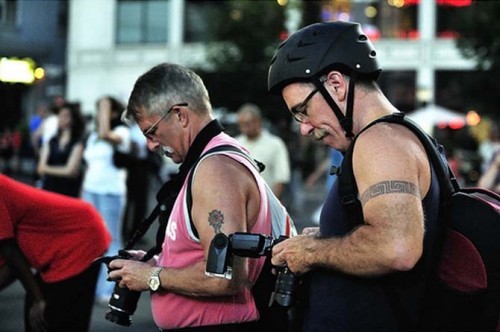
Image via The Discerning Photographer
Recommended Resources:
- “Pros and Cons of Chimping – What is it and How it Can Hurt or Help You?” – Digital Photography
- “Three Main Reasons to Stop Chimping Right Now” – DIY Photography
- “Is Chimping in Photography Good or Bad?” – Photography Life
Composition
Composition is how you arrange the elements in your photograph. Some features in the picture will immediately attract more attention and therefore have more visual weight. The correct arrangement of the visual weight will determine the kind of image you take. The purpose of the picture will determine the composition.
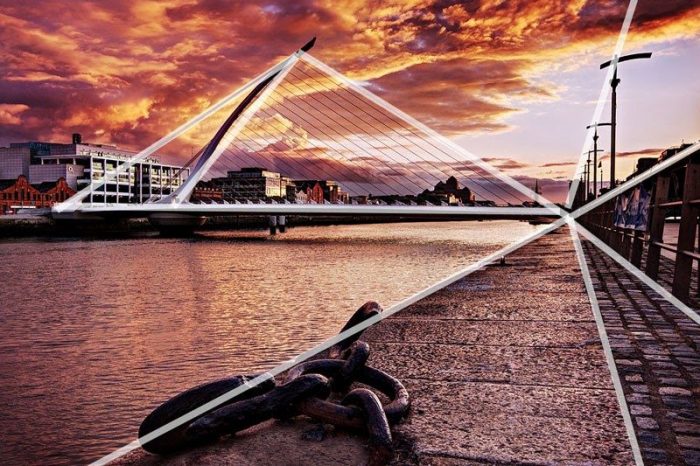
Image via PetaPixel
Recommended Resources:
- “20 Composition techniques That Will Improve Your Photos” – Petapixel
- “6 Essential Composition Rules You Need to Know” – Shutterstock
- “Learning Composition in Photography- Practical Guide” – Photo Traces
Contrast
Contrast is the difference between light and shadows in an image. When there is high contrast, you get an emphasis on the variation, thus stronger texture and color. Low contrast pictures, on the other hand, may look dull in appearance.

Image via Expert Photography
Recommended Resources:
- “Contrast in Photography” – Picture Correct
- “What is Contrast in Photography and How to Use it Correctly” – Expert Photography
- “Low Contrast Photography and How to Correct it in Post-Production” – Petapixel
Depth of Field (DOF)
When you focus your camera on a particular image, you will see that some of the objects are very close, while others are very far away. The distance between the foreground and background is the Depth of Field (DOF).
The aperture and distance to the subject will determine the DOF. You can control the DOF by increasing or narrowing the aperture. The wider the aperture, the narrower the DOF.

Image via Expert Photography
Recommended Resources:
- “What is Depth of Field?” – Digital Camera World
- “Understand Depth of Field (And Its Creative Uses!)” – Expert Photography
- “Understanding Depth of Field- A Beginner’s Guide” – Photography Life
Diaphragm
The diaphragm is the device that will control the aperture. Most modern DSLR cameras have an iris diaphragm that allows you to increase or decrease the aperture due to the overlapping blades.
Recommended Resources:
- “Definition Diaphragm”– Photokonnexion
- “How the Diaphragm In Photography Works”– Photographer Agency
- “Understanding Camera Exposure” – Exposure guide
DSLR Cameras
Digital single-lens reflex (DSLR) are some of the most popular cameras in the market today. You get a digital sensor and reflex mirror, which will direct light to the optical viewfinder from the lens.
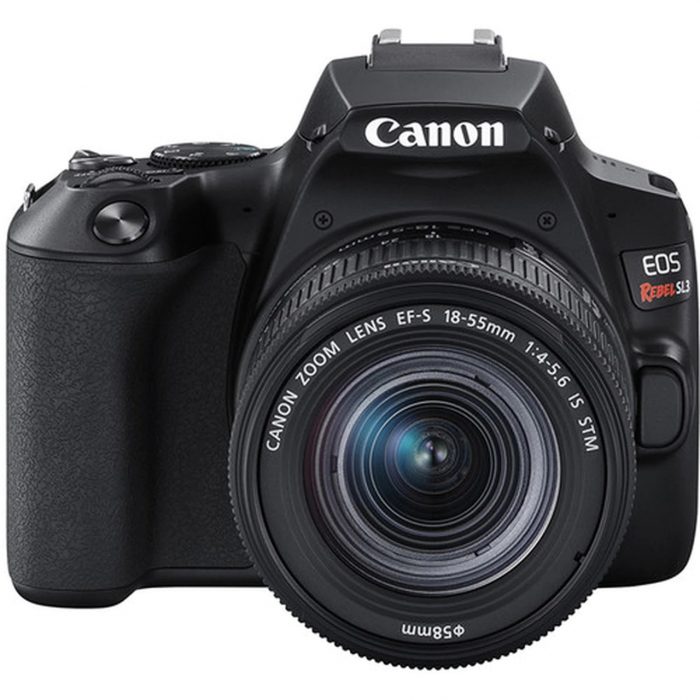
Image via Precision Camera & Video
Recommended Resources:
- “What is a DSLR Camera and How Is It Different From Mirrorless?” – Digital Trends
- “What Makes a DSLR Better Than Other Cameras?” – Science ABC
- “Best DSLR Camera 2019: Best Cameras to Suit All Budgets” – Tech Radar
Dynamic Range
The dynamic range is the difference between the darkest and lightest values in an image, and this term is usually used in reference to a camera’s ability.
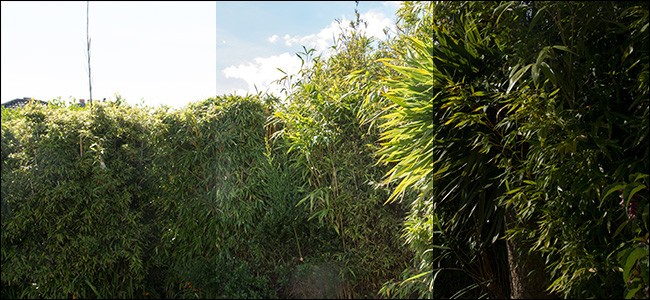
Image via How-To Geek
This is measured in “stops.” Dynamic range is most effective when taking photos with high contrast, and cameras with a higher dynamic range will produce the most detailed pictures.
Recommended Resources:
- “Dynamic Range Photography Explained” – Adorama
- “What is Dynamic Range in Photography?” – How-To Geek
- “Dynamic Range Explained” – B&H
Exposure
Exposure refers to how much light reaches the camera sensor. It determines how bright or dark the final image is. Shutter speed, ISO, and aperture determine the exposure. You can also specify the exposure levels manually, automatically, or through the use of shutter and aperture priority.
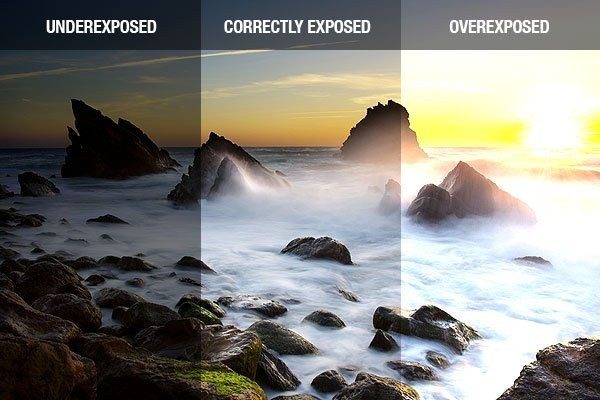
Image via Exposure Guide
Recommended Resources:
- “The Exposure Triangle: A Beginner’s Guide” – Photography Life
- “Exposure Guide” – Exposure Guide
- “Step-by-Step Guide to Long Exposure Photography” – Digital Photography School
Exposure Compensation
Exposure compensation is a setting that allows the camera to brighten or darken the image, depending on your settings. For example, if you are taking a picture and you realize that the light is too bright, you can input negative exposure compensation to take a darker photo. The typical camera will allow the use of compensation of 1/2, 1/3, or full-stop increments.
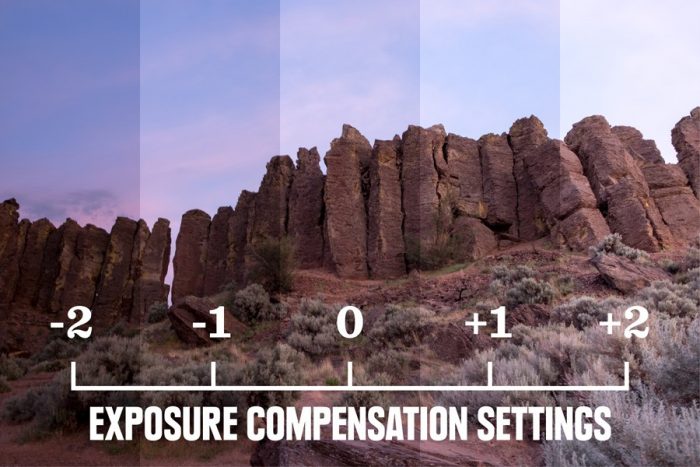
Image via REI
Recommended Resources:
- “What is Exposure Compensation and How to Use It” – Photography Life
- “Exposure Compensation” – Imaging Nikon
- “How to Understand Your Camera’s Exposure Compensation Feature” – Digital Photography School
F-Stop
Sometimes referred to as the F-Number, F-Stop is the ratio of the lens focal length to the diameter of the pupil. In simpler terms, F-Stop is the number your camera gives when you change the aperture. When displayed on a camera, you will see the F-Stop written as a fraction like “f/8, f/2, or f/22.” Since it is expressed in terms of fractions, and f/8 would be larger than an f/22.

Image via Expert Photography
Recommended Resources:
- “What is F-Stop and How Does It Work?” – Photography Life
- “Understanding F-Stops: How To Use F-Stops in Photography” – Master Class
- “Cheat Sheet: How To Understand F-Stops” – Digital Camera World
Filters
Filters are the attachments you put on the front or back of your camera. They impact the quality of light, which reaches your sensor while others will prevent scratches on your lenses. Typically you find filters made of plastic, resin, or glass.

Image via Camera Gear Store
Most cameras will allow you to attach the filter without any special requirements. Others will require that you have a separate mounting system to utilize them. There are different types of filters available, and one such filter is the polarizer, which will accentuate or block polarized light. You reduce the haze and reflections in your photo. Other types of filters include dark or neutral density filters, color, and graduated filters.
Recommended Resources:
- “A Beginner’s Guide to Camera Lens Filters” – Adorama
- “The Best Camera Filters for DSLRs and Mirrorless Cameras” – Digital Trends
- “Choosing a Camera Lens Filter” – Cambridge in Colour
Focal Length
The focal length, typically expressed in millimeters (mm), is a system used to measure the distance between the center of the lens and the sensor of the camera. Focal length is used to describe the angle of view of a lens, not the physical size of a lens.
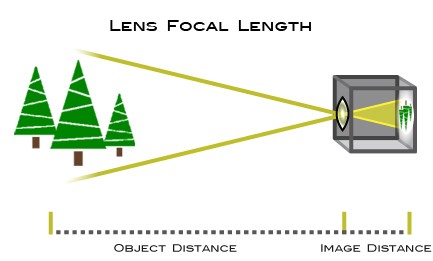
Image via Nikon
Recommended Resources:
- “Understanding Focal Length” – Nikon
- “What is Focal Length in Photography?” – Photography Life
- “How to Understand Focal Length (In Four Easy Steps)”– Expert Photography
Focusing
You cannot get the right picture without focusing. Many lenses will only allow you to focus on a particular distance each time while anything outside the range will lose focus.
Most cameras will give you a wide range of out-of-focus options, including single-servo versus continuous-servo AF, which will tell the camera to auto-focus on a stationary object or to move when your subject moves.
If you are taking photographs of landscapes, you will most likely use the single-servo, or if, you are capturing movement, you will most likely use the continuous option. Other options for focusing include single autofocus point, automatic autofocus points, and 3D tracking autofocus points.

Image via ShutterRunner
Recommended Resources:
- “Camera Focusing for Beginners” – Amateur Photographer
- “How Focus Works” – B&H
- “Understanding Focus in Photography” – Photography Life
GIF
A GIF or Graphic Interchange Format is an image file that you can use to create still or animated images.
Image via TwistedSifter
You get no sound, and if you code it in a certain way, you can load sequential pictures. You would typically use them for entertainment purposes, and they are a fantastic way to create memes. GIFs are 8-bit 256 colors.
Recommended Resources:
- “Everything You Need to Know About GIFs Explained in GIFs” – Mic
- “GIFs: A Simple But Powerful Communications Tool” – Explain Everything
- “What is a GIF, and How Do You Use Them?” – How-to Geek
Golden Hour (or Magic Hour)
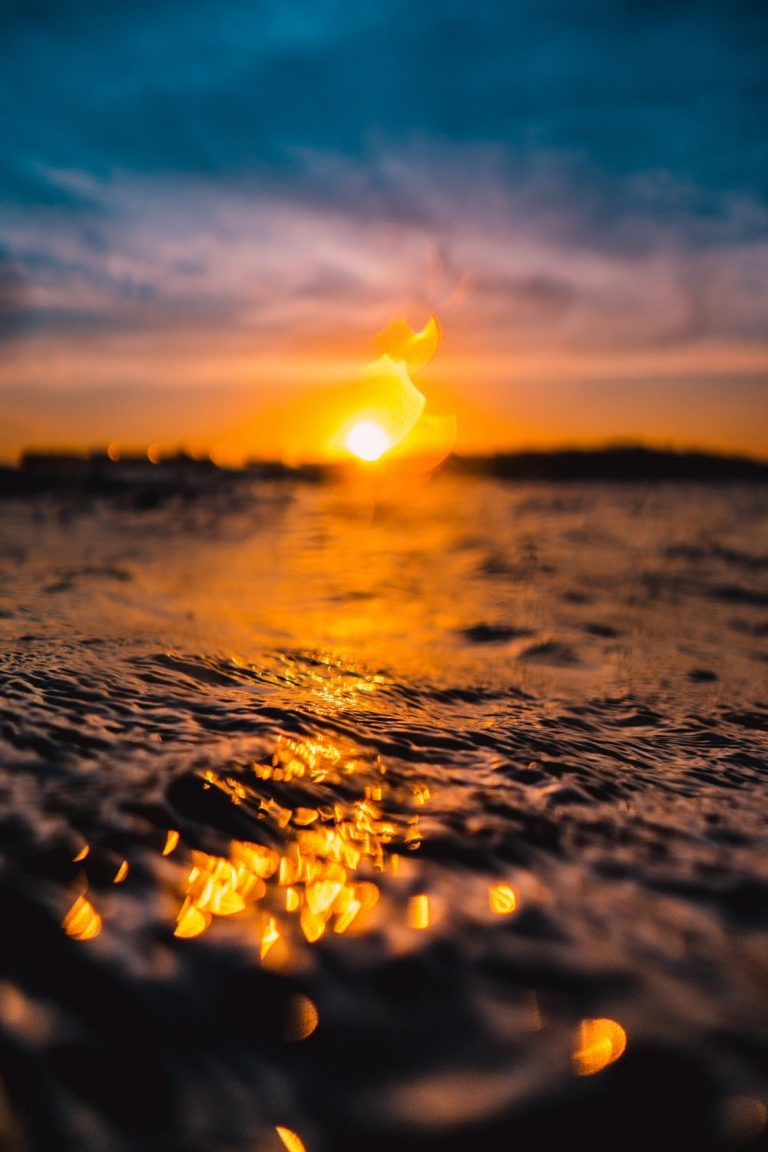
Image via Ryan Loughlin
Sunset and sunrise photos are popular with most people who consider themselves photographers, but to capture that perfect shot, you need to be at the right place during the golden hour. This is the period right before sunset and sunrise when the sun is low on the horizon, and you get light with a red or orangish shade.
Recommended Resources:
- “Golden Hour (Photography)” – Wikipedia
- “How To Get the Most Out of Photographing at Golden Hour” – Digital Trends
- “Calculate Your Local Golden Hour” – Petapixel
High Dynamic Range (HDR)
Camera sensors cannot necessarily distinguish features in the same way the human eye can. When you are focusing on an image that has some shadows, you have the option of capturing either the image or shadow, resulting in poor exposure of the other.
You can correct this problem by creating a high dynamic range (HDR) images. It requires that you take two photographs and blend them together so that you utilize the parts with the best exposure. You will need the right software to do this, such as Photoshop. The trick to getting the right images is to take as many HDR photos as you can so that you capture the movement for easy blending.
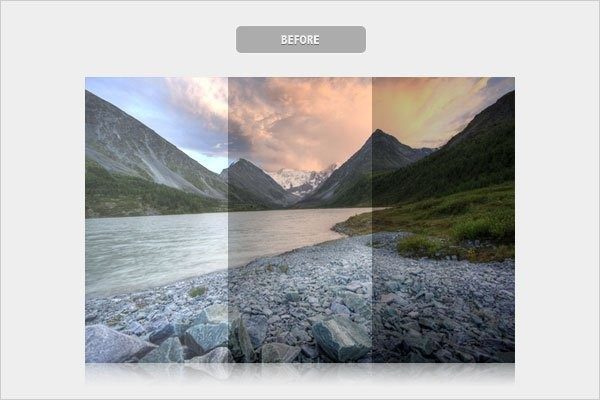
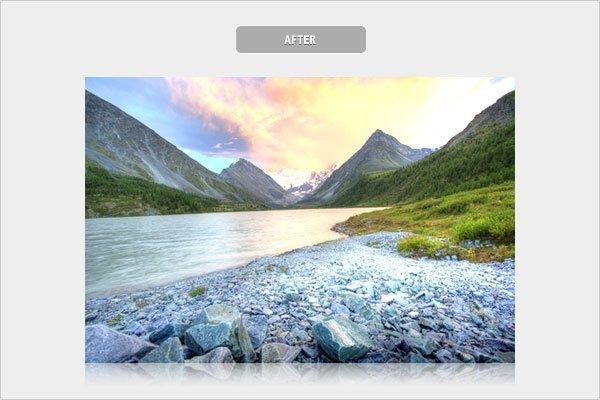
Image via Exposure Guide
Recommended Resources:
- “What is HDR Photography?” – Digital Trends
- “HDR Photography” – Stuck in Customs
- “10 Common HDR Photography Mistakes and How to Avoid Them” – Expert Photography
Hot Shoe
You will find the hot shoe at the top of the camera, and it allows you to mount or trigger different devices. Such devices include wireless transmitters, electronic flashes, GPS devices, standard microphones, viewfinders, and field monitors.
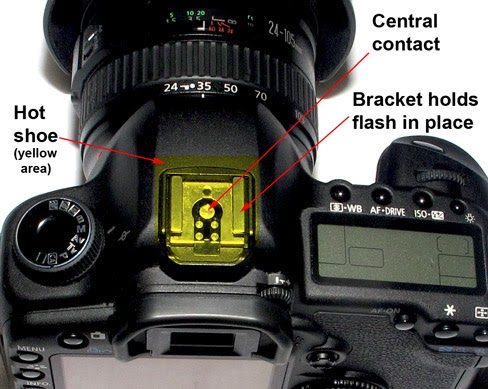
Image via Photokonnexion
Recommended Resources:
- “What Is The Hot Shoe? (and How You Can Use It!)” – Expert Photography
- “What is the Hotshoe?” – Improve Photography
- “What is A Hot Shoe Flash” – Shutter Muse
Hyperfocal
Hyperfocal refers to the distance where the focus provides a deeper depth of field. You will find landscape photographers using it so the scenes are as sharp as possible.
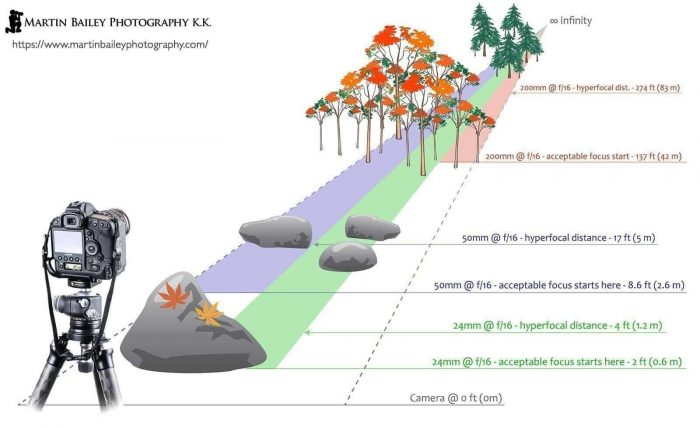
Image via Martin Bailey Photography
Recommended Resources:
- “Understanding Your Camera’s Hyperfocal Distance” – Cambridge in Colour
- “Hyperfocal Distance Explained” – Photography Life
- “Understanding Hyperfocal Distance (Podcast 437)” – Martin Bailey Photography
Image Stabilization
If you do not have a very steady hand when holding your camera, you will need the image stabilization feature. The different kinds of stabilization features include emergency stabilization, which is in the lenses and will work by moving the lens elements to compensate for any movement.
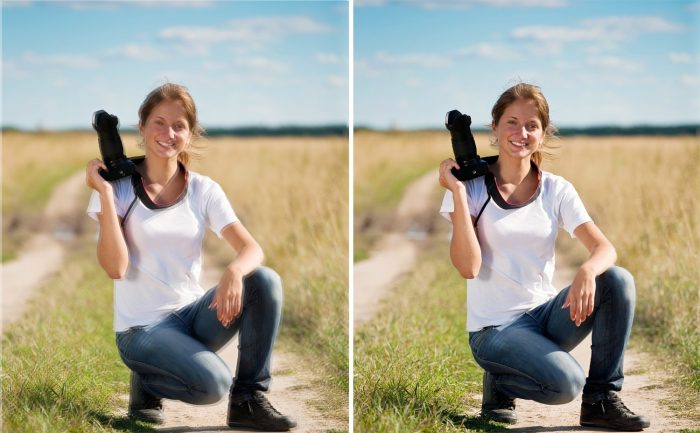
Image via Premium Beat
You will also find body or IBIS stabilization that will move the sensor. Not only does it stabilize the camera, but you will also find the picture very useful in low light conditions.
Recommended Resources:
- “Image Stabilization: When to Use it and When to Turn it Off” – B&H
- “How to Stabilize Your Camera for Sharper Images”– Photography Talk
- “Easy Guide to Understanding Lens Stabilization vs. In Camera Stabilization” – Expert Photography
ISO
ISO refers to the light sensitivity levels of the camera. A camera that has ISO 100 is not sensitive to light and is excellent for daytime shooting. An ISO 3200 camera is very sensitive and is fantastic for low-light conditions. To get the right kind of exposure, you need to balance the ISO with shutter speed and aperture.
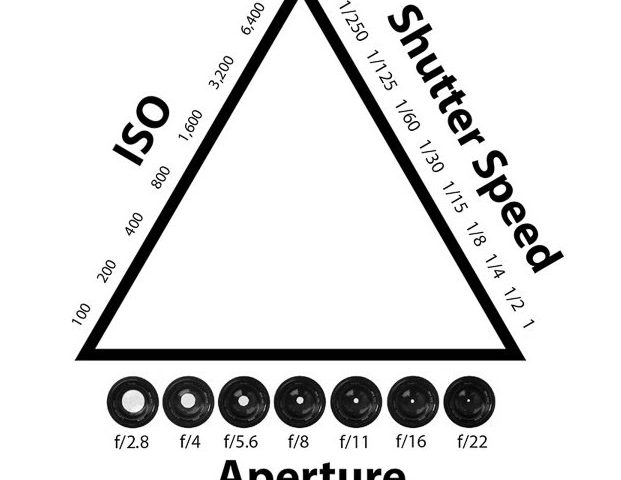
Image via Digital Photography School
Recommended Resources:
- “What is ISO? Settings in Digital Photography”– Digital Photography School
- “What is ISO?”– Digital Trends
- “What is the Best ISO to use?” – Image Maven
Jaggies
Jaggies refers to how curves or angles will appear in a digital image. They usually take the appearance of a staircase, and the number of pixels will determine their appearance. You will often find jaggies in photographs you take at lower resolving powers.
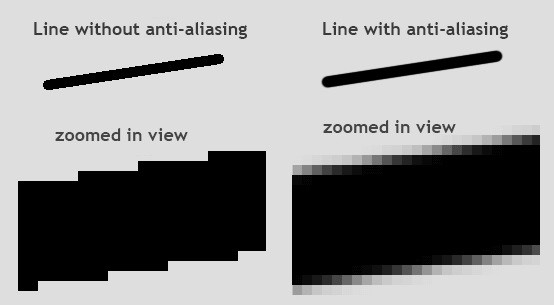
Image via Definition.net
Recommended Resources:
- “How to Avoid ‘Jaggies’: Turning on Anti-Aliasing” – Mojoprint
- “What are Jaggies?” – Techopedia
- “Aliasing: Should You Be Concerned About Jaggies?” – Photo Review
JPEG
Many people will save image files using the Joint Photographic Experts Group (JPEG). It is the default format for many photographs, but they have the main disadvantage of being heavily compressed.
You only get to see an 8-bit color, unlike other cameras that can give you up to 14-bit color. The latter will provide you with access to 16,384 shades of red, green, and blue, while the former only gives you access to 256 shades of the same. The main advantage with JPEG is that the files are small in size, and you will not have compatibility issues with many applications.
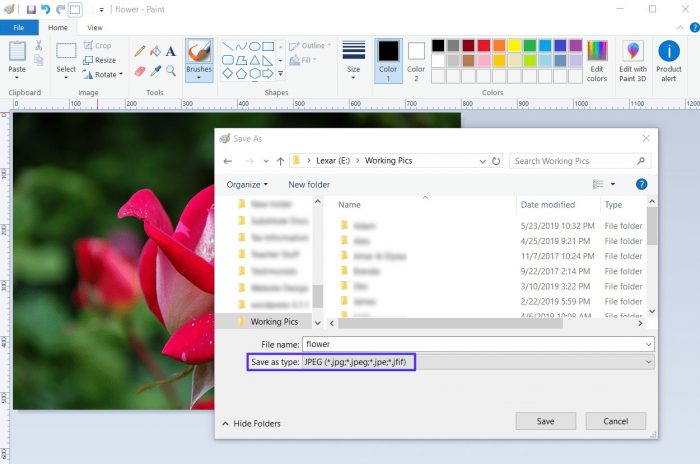
Image via Kinsta
Recommended Resources:
- “Convert Image to JPEG” – Online Utility
- “JPG vs JPEG: Understanding the Most Common Image File Format” – Kinsta
- “Pros and Cons of JPEG Image Compression”– Byte Scout
Lens Flare
When you use a mirror in the dark and have multiple sources of light on, you will get some flare due to the light bouncing off the surface of the mirror. The same situation may occur in camera lenses, although some have multiple anti-reflective coatings that reduce or minimize the reflection.
Lens flare is not always a negative thing because it can result in some pretty amazing pictures, especially where landscapes are concerned. It can interfere with the subject matter and the quality of the image. You must invest in a camera with the right kind of anti-reflective coating to take care of this problem.
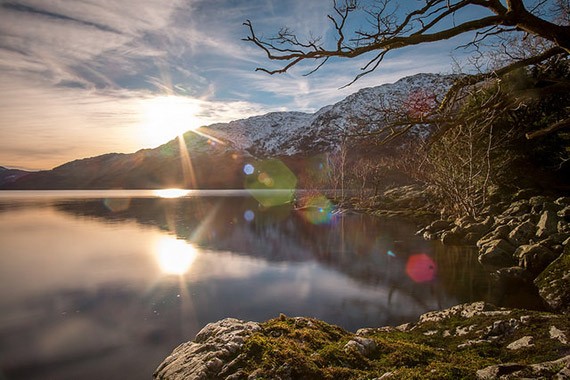
Image via PictureCorrect
Recommended Resources:
- “Understanding Lens Flare”– Photography Life
- “Lens Flare- Good or Bad?” – Diana Elizabeth Blog
- “Understanding Camera Lens Flare” – Cambridge in Colour
Light
Any picture you take is highly dependent on the light. That is why you see professionals carry around equipment to ensure that they get the right quality of light.
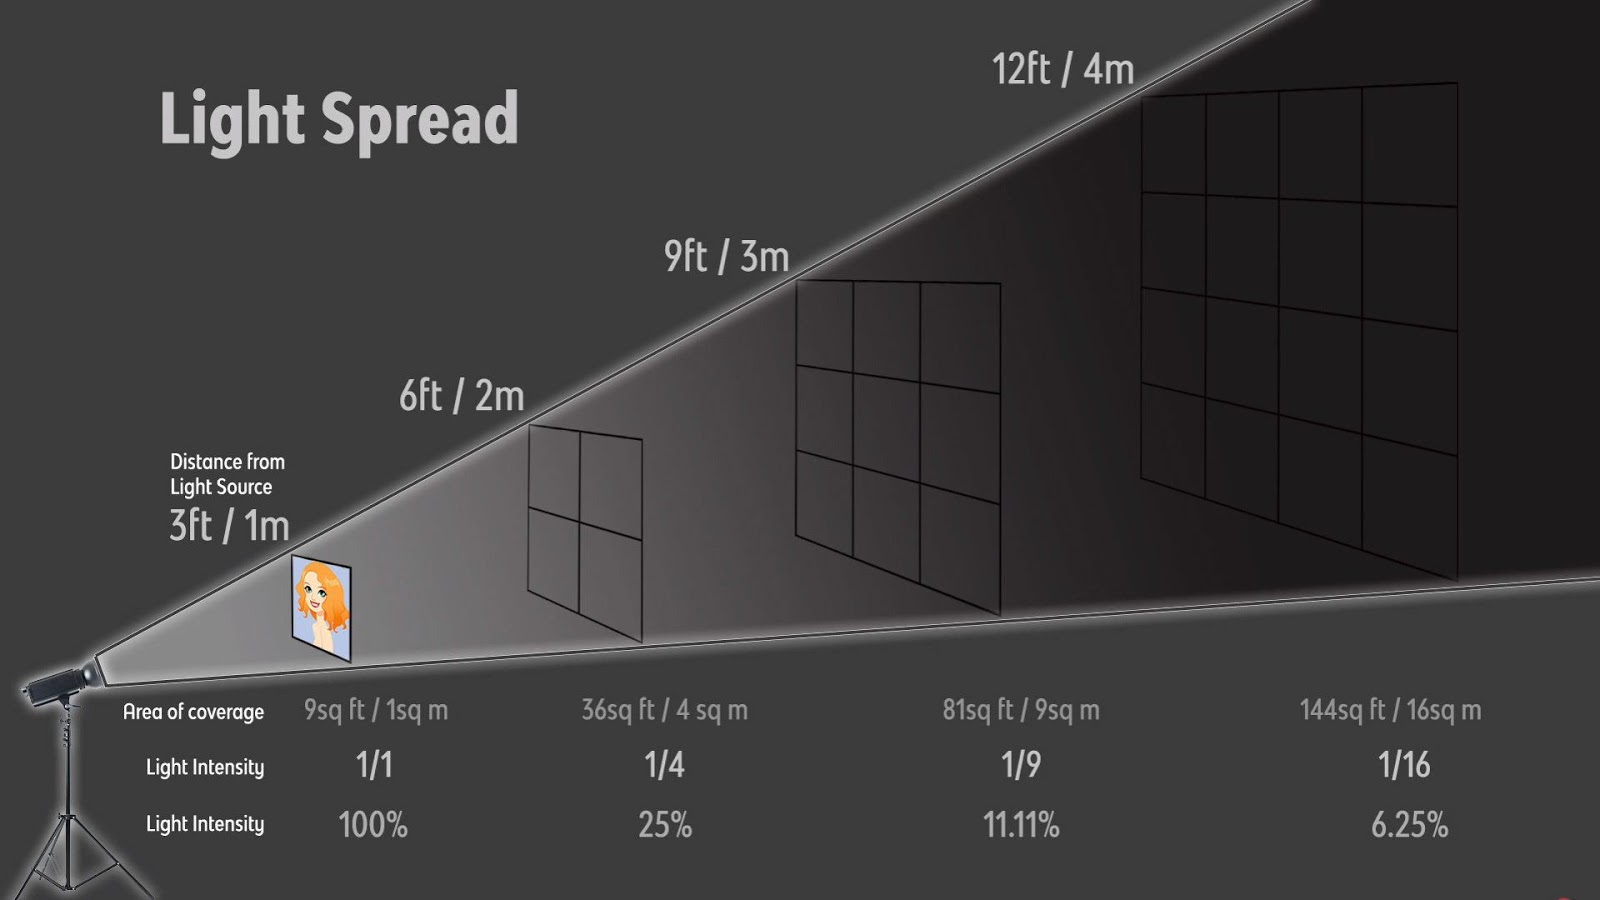
Image via DIY Photography
It is also not strange to hear a photographer insist that he or she needs to take pictures at a particular time to capture the best light. If you look at it in the broad sense, there is really nothing like good or bad light because it will depend on the type of picture you want to take.
Recommended Resources:
- “The Ultimate Guide to Learning Photography: Lighting for Beginners”– Creativelive
- “12 Tips for Indoor Natural Light Photography”– Digital Photography School
- “5 Lighting Tips to Improve Your Photography” – Picture Correct
Long Exposure
Long exposure is a technique that uses shutter speeds of more than thirty seconds to create a blurred effect on moving elements. This technique is commonly used for light or water subjects, but there are numerous other uses for it.
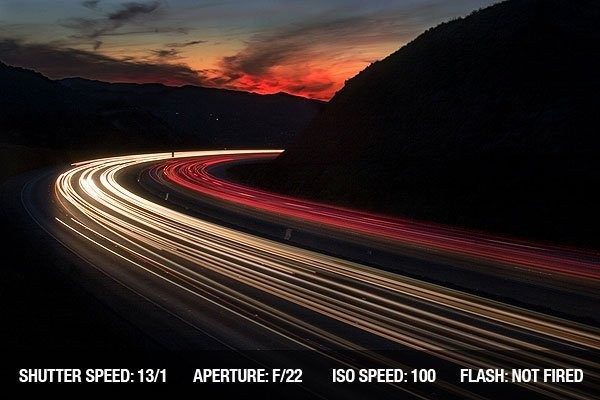
Image via Exposure Guide
Recommended Resources:
- “What is Long Exposure Photography?” – Creative Photographer
- “Long Exposure Photography Tips” – Exposure Guide
- “Ultimate Guide to Long Exposure Photography” – Capture Landscapes
Macro Lens
A macro lens is a lens that is optimized for taking extreme close-up shots of small subjects. The focus of a macro lens is much closer, which allows you to fill a frame while capturing as much detail as possible. Macro lenses are great for capturing product and nature images.
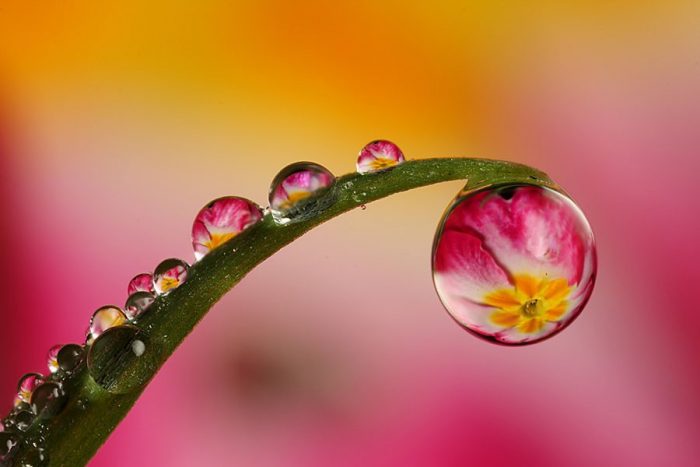
Image via FotoZZoom
Recommended Resources:
- “Macro Lenses” – Photography Mad
- “What is a Macro Lens? Everything You Need To Know as a Beginner” – BL Blog
- “Complete Guide to Macro Photography for Beginners” – Photography Life
- “The Ultimate Guide to Macro Photography (137 Best Tips)” – Expert Photography
Metering
There is a particular way your camera will read light, especially with regards to darkness, contrast, and brightness. It will suggest the exposure so the final picture has the right level of intensity.

Image via Matador Network
Most cameras have a default setting of mid-gray because the metering system may face some confusion when there is too much black or white in the scene. The result is white or black scenes end up being grey. It is at this time you should take advantage of exposure compensation for the right exposure.
Recommended Resources:
- “Understanding Metering and Metering Modes” – Photography Life
- “A Basic Introduction to Understanding Metering Modes” – Zukus
- “Metering Mode” – Wikipedia
Megapixels
Simply put, megapixels are the resolution of the camera sensor. Expert photographers will tell you that while it is essential, the sensor size has a more significant role to play in regards to the quality of the image.
![]()
Image via Photography Life
Recommended Resources:
- “What Are Megapixels? How Many Do I Need?” – Veprit
- “An Explanation of Megapixels and How They Affect Photos” – The Spruce Crafts
- “How Many Megapixels Do You REALLY Need?” – Photo Review
Noise
Noise is the random variation in brightness or color that can sometimes result in a grainy veil that obscures details in photos. Although it’s impossible to have a picture without some noise, it’s important to note an extreme amount of noise will make any picture unusable.
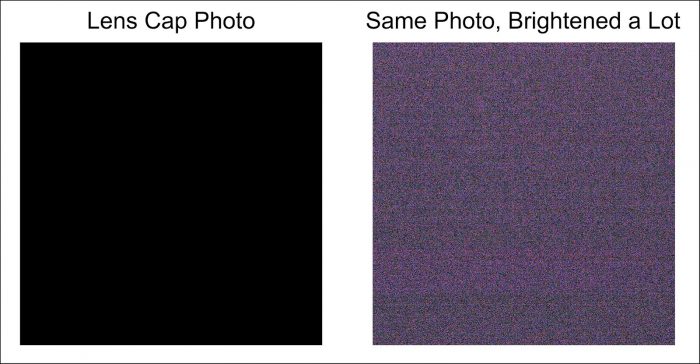
Image via Photography Life
Recommended Resources:
- “Digital Noise: What is it & How to Correct It” – Cole’s Classroom
- “Noise in Photography: What it is and How to Correct It”– Capture the Atlas
- “Digital Camera Image Noise: Concept and Types” – Cambridge in Colour
Overexposure
Referring to the brightness of an image, overexposure means the image is extremely bright, or in some instances, parts of the photo are pure white.
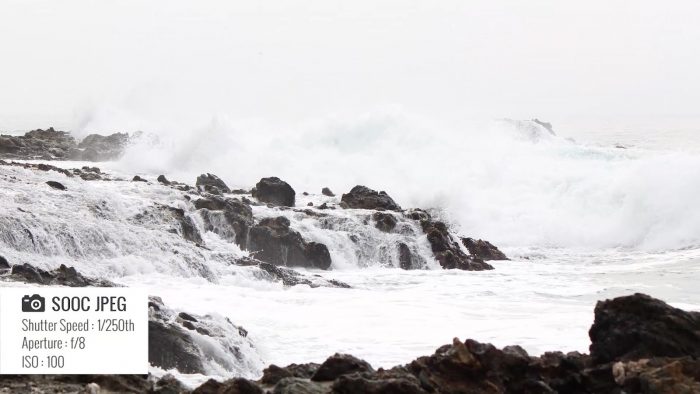
Image via SLR Lounge
This can be used as a technique for photographers, if they want an extremely bright image, but it typically refers to an image that is brighter than it is supposed to be.
Recommended Resources:
- “15 Creative Uses of Overexposure” – Digital Photography School
- “Underexposure vs Overexposure: Everything You Need to Know”– Expert Photography
- “Photography 101: Underexposure vs Overexposure” – The Spruce Crafts
PNG
PNG stands for Portable Network Graphics. It’s a file type commonly used for web images because it creates a larger file, however, it’s not typically great for print images as the pictures may become distorted.
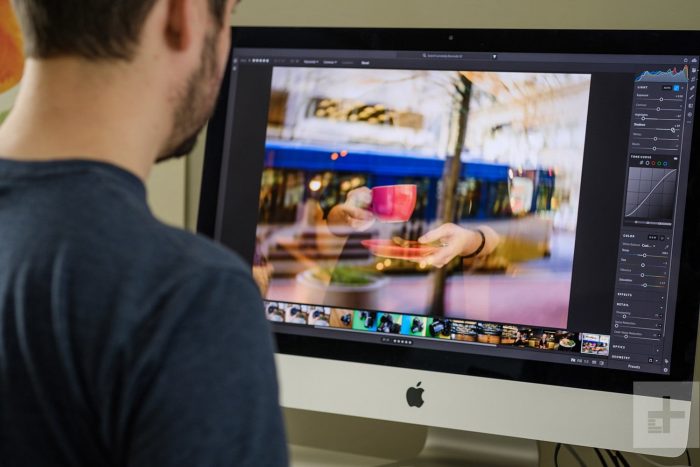
Image via IvanExpert
Recommended Resources:
- “JPEG vs PNG: When and Why to Use One Format Over the Other” – Digital Trends
- “Web Designer’s GUide to PNG Image Format” – WebFX
- “What is a PNG (Portable Network Graphics)?” – WhatIs.com
Panning
Panning is the continual horizontal movement of a camera scanning a moving subject. It’s used to create the feeling of motion without blurring the subject of the photo.
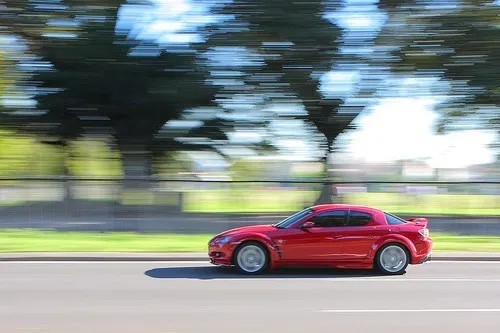
Image via Digital Photography School
Recommended Resources:
- “Mastering Panning- How to Photograph Moving Subjects” – Digital Photography School
- “What is Panning?” – Corel Discovery
- “6 Tips to Master Panning Photography” – Digital Photography School
Prime Lens
A prime lens is a fixed focal length, which means they are optimized to a specific focal length. Unlike a zoom lens, a prime lens generally has better optical performance with sharper images.
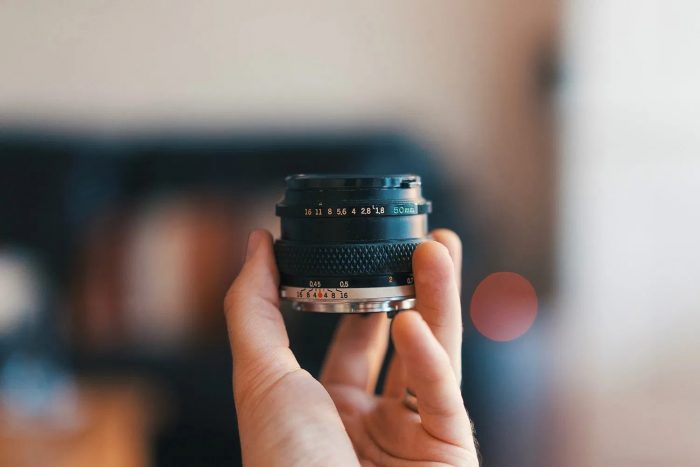
Image via Digital Photography School
Recommended Resources:
- “9 Things You Should Know About Using Prime Lenses” – Tech Radar
- “Prime Lens 101” – B&H
- “8 Reasons to Use a Prime Lens” – Photography Concentrate
RAW
A RAW file is an uncompressed version of an image file that allows for greater control over the final image. RAW allows for more control over white balance adjustments, sharpness and noise adjustments, as well as image data. Compared to a JPG image, however, RAW files take up more space and aren’t universally compatible.
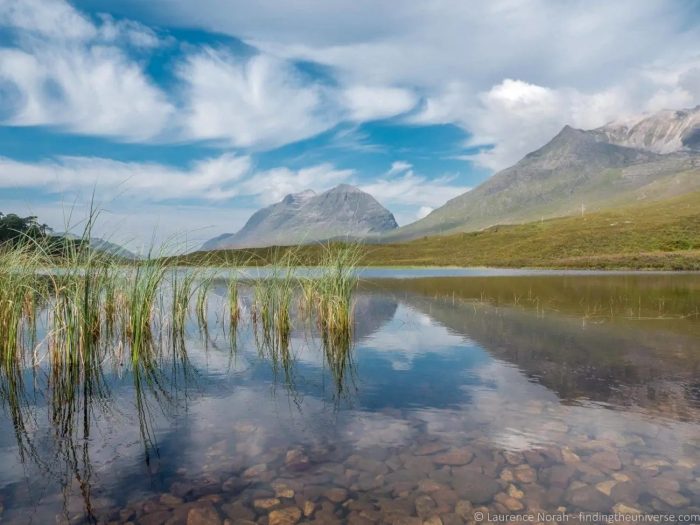
Image via Finding the Universe
Recommended Resources:
- “10 Reasons Why You Should Be Shooting in Raw” – Photography Concentrate
- “What is RAW Photography?” – Icon Photography School
- “RAW vs JPEG: The Ultimate Visual Guide” – SLR Lounge
Red Eye
Red-eye refers to the effect a flash may have on the eyes of a photographic subject. The red-eye effect is typically associated with point-and-shoot cameras and pop-up flash attachments on DSLR cameras.
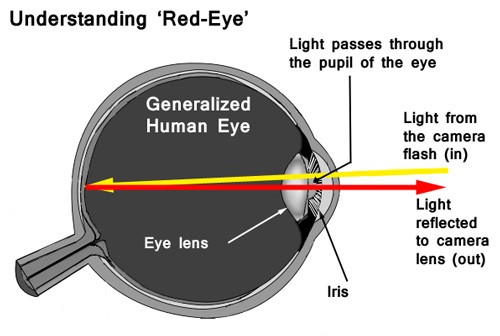
Image via Photokonnexion
This happens when the light from the camera flash is reflected off the back of the eye into the camera lens. Although it can be annoying to deal with, red eye is easily removed with post-processing software.
Recommended Resources:
- “How to Fix the Red Eye Effect in Photos” – All About Vision
- “What is Red Eye and How Can You Prevent It?” – The Spruce Crafts
- “The Red Eye Effect: What It Is, Avoiding It, and Removing It” – Photography Mad
Resolution
Resolution is the measurement of the pixel plane, and is used for measuring in most equipment like cameras, scanners, and digital images. Resolution is measured in pixels, which means the higher the pixel, the better the resolution. Resolution plays a big role in editing images, especially when resizing pictures.
![]()
Image via University of Michigan
Recommended Resources:
- “Resolution: Understanding Resolution in Digital Photography” – Exposure Guide
- “Resolution in Photography” – Photography Course
- “De-Mystifying Resolution in Photography” – Picture Correct
Saturation
Saturation is the intensity of a color. The color is more vivid with higher saturation, and closer to gray when the saturation is low.
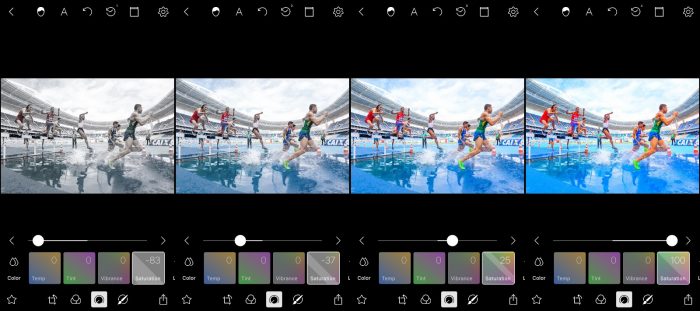
Image via Medium
This is another key component when editing photos, and it’s important to understand saturation so you can avoid over-saturating a picture. When the colors in the picture are too vivid from saturation, the photo is distorted and looks unnatural to the viewer.
Recommended Resources:
- “What Do We Mean By Saturation When Talking About Saturation?” – Shuttermuse
- “What is Saturation? And How to Get Optimal Saturation”– Photography Life
- “Photo Processing Basics: Use Hue and Saturation Effectively” – Outdoor Photographer
Shutter
A shutter is part of the camera that allows light to pass for a period of time, which exposes the sensor to light, making it possible for a permanent image to be created. There are different types of camera shutters, and the two most common are leaf shutters and focal plane shutters.
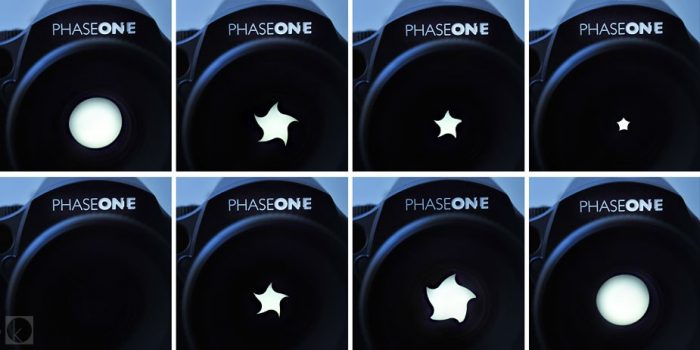
Image via Premium Beat
Recommended Resources:
- “Photography Basics 101: Aperture, ISO, and Shutter Speed” – Improve Photography
- “Shutter: Photography” – Britannica
- “Camera Shutter Types” – Digital Photography Tips
Shutter Speed
Shutter speed is the amount of time the shutter remains open, which can be controlled to capture different kinds of images. Shutter speed is measured in seconds, and by changing the speed, a camera is able to capture moving subject or low light images more effectively.
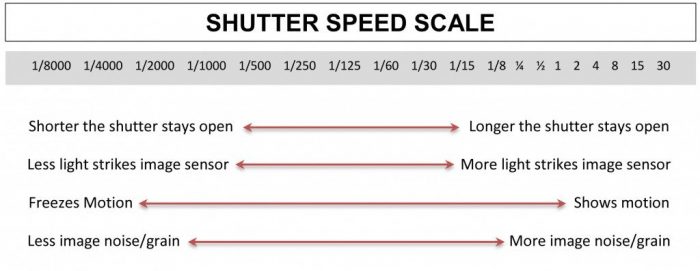
Image via VirtualPhotographyStudio
Recommended Resources:
- “Understanding Shutter Speed for Beginners”– Photography Life
- “What is Shutter Speed?” – Creative Live
- “Shutter Speed Explained for the Beginning Photographer” – Photography Talk
Telephoto Lens
A telephoto lens is a lens with a long reach, which can be used to magnify and capture a subject that is far away. Telephoto lenses are great for nature photography or getting action shots at sporting events, as well as just adding distance between you and your subject if needed.
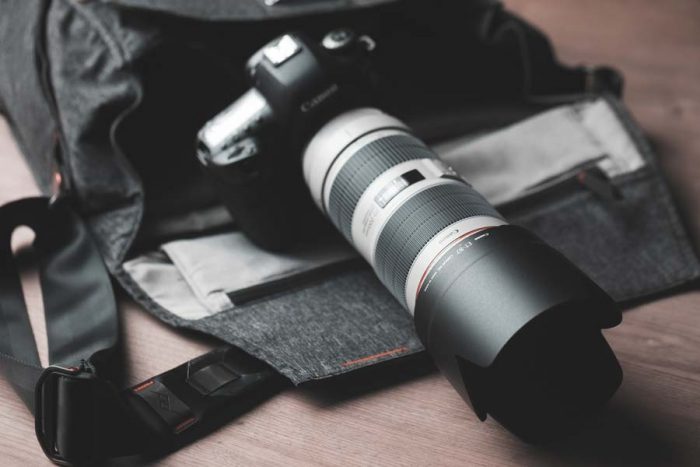
Image via BorrowLenses
Recommended Resources:
- “What is a Telephoto Lens and Why Should I Use One?” – BL Blog
- “Photography 101: What is a Telephoto Lens?” – Masterclass
- “How to Maximize Sharpness with a Telephoto Lens” – Digital Photography School
Time-Lapse
Time-lapse is a series of photos taken over a period of time. The period of time can be minutes, hours, or even days. When the series of photos is played back, time seems to move at a faster rate than which the series was taken.
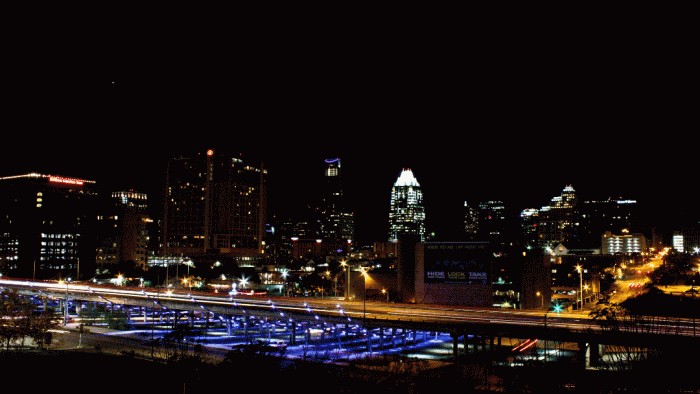
Image via Giphy
Recommended Resources:
- “Time-Lapse Photography: How to Make Your First Time-Lapse Video” – DIgital Camera World
- “The Complete Guide to Time-Lapse Photography” – Expert Photography
- “10 Tips for Shooting Time-Lapse” – Enrique Pacheco
Tonal Range
The tonal range is used to describe color quality and the tones ranging from the darkest and the shadows to the highlights and brightest whites.

Image via Digital Photography School
Whites are the brightest part of an image, where details are indiscernible, while highlights are the bright areas where the texture and detail can still be seen. In contrast, blacks are the darkest parts of an image, while shadows are dark areas with discernable details and texture.
Recommended Resources:
- “Light & Photography: Exposure and Tonal Range” – Envatotuts+
- “Dynamic Range and Tonal Range in Digital Photography” – Lifewire
- “Expanding Photography’s Tonal Range” – Outdoor Photographer
Viewfinder
A viewfinder is the part of the camera used to focus and compose the subject of an image. Viewfinders can be optical or electronic. Optical viewfinders are common on DSLR cameras, and they allow you to see precisely what is in the shot by looking through the lens. Electronic viewfinders are typically displayed on the LCD screen.
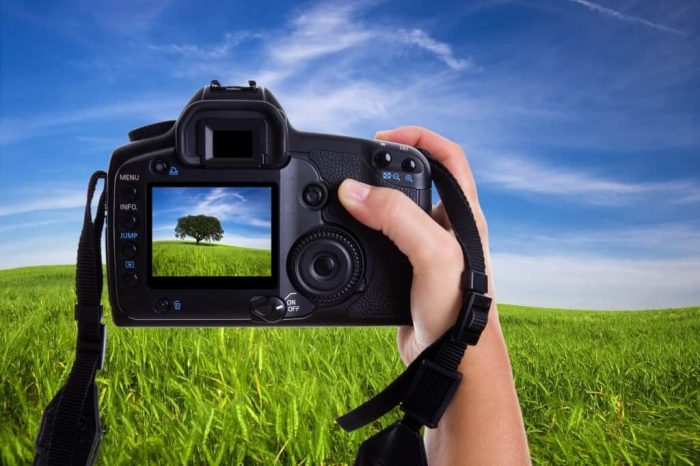
Image via Improve Photography
Recommended Resources:
- “How to Easily Understand and Use the Camera Viewfinder” – Expert Photography
- “7 Things You Need to Know About Electronic Viewfinders” – Photography Concentrate
- “Should I Use the LCD or Viewfinder on my Digital Camera?” – Digital Photography School
Watermark
A watermark is an image, text, or logo placed over a photo to make it more difficult to copy or use the photo without the photographer’s permission.

Image via Computer Hope
Recommended Resources:
- “The Pros and Cons of Watermarks on Photographs” – B&H
- “Watermark Photos? Should You or Shouldn’t You?” – Digital Photography Tips
- “Photography Watermarks — Why Do You Need a Photography Watermark?” – Fix the Photo
White Balance
White balance is the adjustment of colors for a natural looking image, as well as the camera’s ability to color correct in different lighting conditions. The temperature of a color affects how an image will turn out, which in turn may require white balance adjustments to make the image look more natural.


Image via Photography Life
Recommended Resources:
- “Understanding White Balance” – Cambridge in Colour
- “What is White Balance?” – Nikon
- “Introduction to White Balance” – Digital Photography School
Wide Angle Lens
A wide angle lens has a short focal point with a wide field of view. This lens can be used to capture more of a scene while allowing for close-up detail without eliminating the background of a photo.
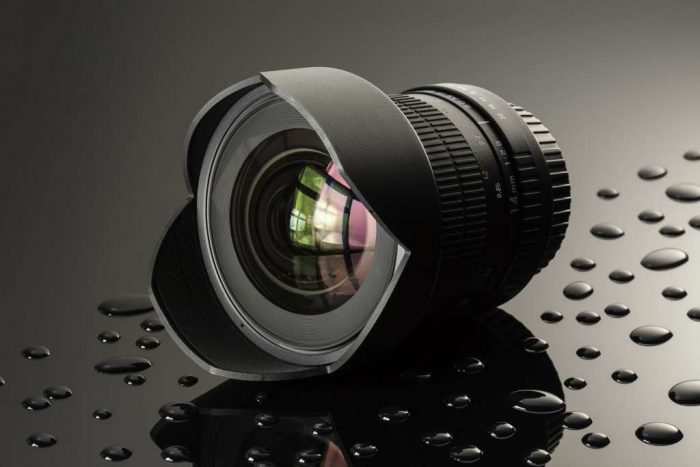
Image via Adorama
Recommended Resources:
- “5 Mistakes Beginners Make with Wide Angle Lenses and How to Avoid Them” – Photo Mentor
- “What is a Wide Angle Lens? (And When To Use One)” – Expert Photography
- “10 Tips for Shooting Wide-Angle” – Improve Photography
Zoom Lens
A zoom lens can vary its focal length and angle of view by physically moving the optic elements. A zoom lens covers a range of focal lengths, which allows you to take varying pictures without having to switch out lenses to get a different length or angle.
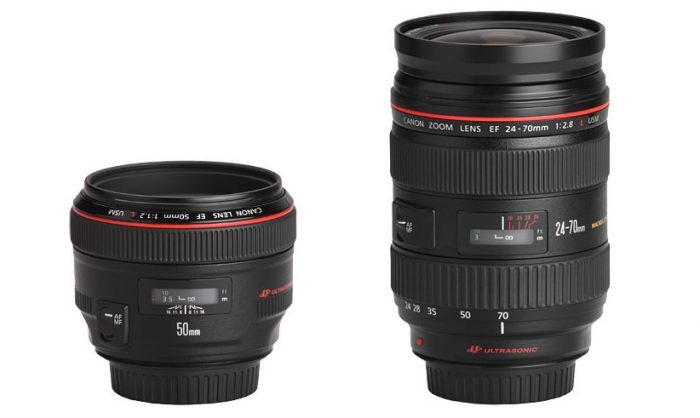
Image via Photography Life
Typically, a zoom lens is not as sharp as a prime lens, but it’s nice to use a zoom lens for event photography or photojournalism when you need to be able to switch angles quickly.
Recommended Resources:
- “What is a Zoom Lens and When Do You Need One?” – Expert Photography
- “Primes Versus Zoom Lenses: Which Lens to Use and Why” – Digital Photography School
- “What is a Zoom Lens? When and Why to Choose a Zoom Lens?” – Sigma Blog
