Urban Photography 101: What is It & How Can You Get Started?
In this article, we take an in-depth look at urban photography. We discuss what it is – what it isn’t – and cover examples, tips, and recommended gear to help you get started.
We understand that you’re bursting with enthusiasm to go out and capture some quality urban photographs. We get it; it’s a great genre to practice. But before we free you into the urban wild, we want to ensure you have all the tools needed to go out and survive on your own.
We’ve designed this guide to be fun and educational. So by the end of this article you will have all the knowledge and power required to create incredible urban photographs. So let’s get started…
Read on or use the links to below to “jump” to the section you’d like to check out:
- What is Urban Photography?
- Urban Photography Examples & Styles
- How to Get Started
- Tips
- Choosing the Best Gear
Urban Photography Explained
Urban photography has risen in popularity over the past 10 years. It’s the kind of genre that allows photographers to push creative boundaries and explore the nuances of their environment. In its simplest form, urban photography is the documentation of the urban space.
The urban space tends to pertain to cities that have raw characteristics such as architecture, brickwork, streets, and a well-populated area. A common misconception, however, is that urban photography is the same as street photography; it isn’t. Here’s why…
Urban Photography vs. Street Photography
Street photography is a very broad term for candid photography. Street photography can exist in cosmopolitan cities, smaller towns, and even on the beach. While urban photography is similar to street photography, it is its own genre and focuses on a very specific approach and type of area of photography.
For the most part, urban photography is shot candidly. However many hipster-style brands lend from the urban aesthetic and build it into their fashion and portrait photography.
We should also point out that urban photography is not limited to including people in images.
10 Tips to SELL Your Used Camera Gear FAST

Urban Photography Examples & Styles
Urban Geometry Photography
Urban geometry photography is especially popular. This kind of work focuses on the relationships between color, shapes, and architecture that all exist within the urban space.
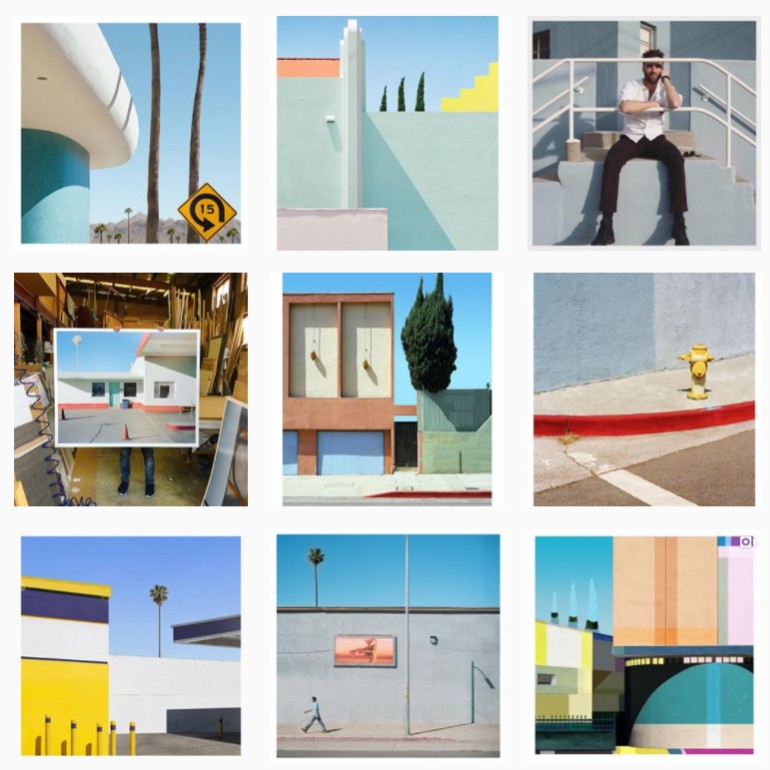
LA-based photographer, George Byrne, is an excellent example of how a person can use the urban landscape to create visually compelling images.
His work is best described as abstract urban photography. As you can see below, his images, do not have an obvious subject, but rather they take different parts of the scene, bring them together, and make a full image from them:
As you can see from the image below, urban geometry photography completely removes any living subject from the photograph.
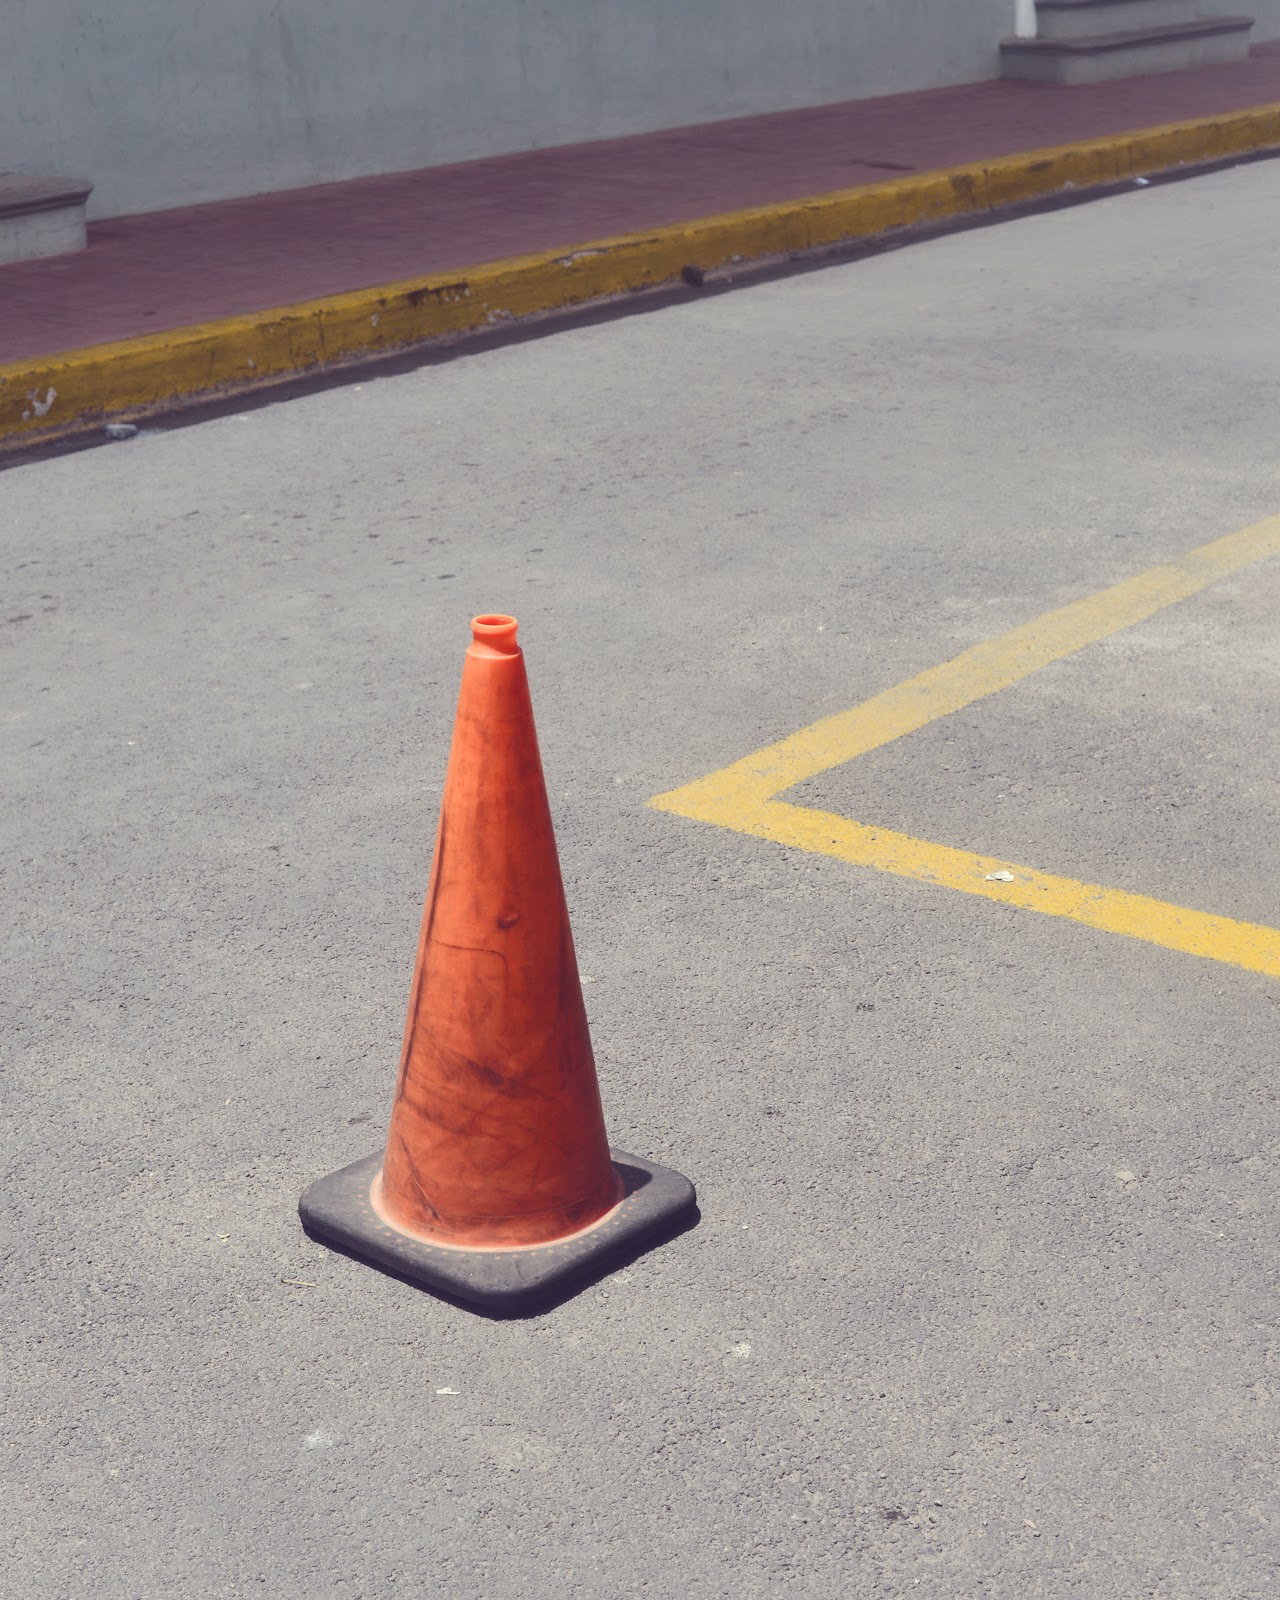
Photo Credit: Dan Ginn
Can you see how the shapes all make an individual contribution to the image?
Let’s break it down…
In the background, the pathway acts as a leading line across the upper section of the photograph. On the center-right of the image, the yellow road marks create a triangular shape that points towards the foreground. The foreground consists only of a simple traffic cone that adds more value to the photograph.
It’s important to notice that each of the three components are not overbearing. None of them “take over” the image. They are very subtle in their placement, but together they’re a powerful force that encourages the audience to stay with the image.
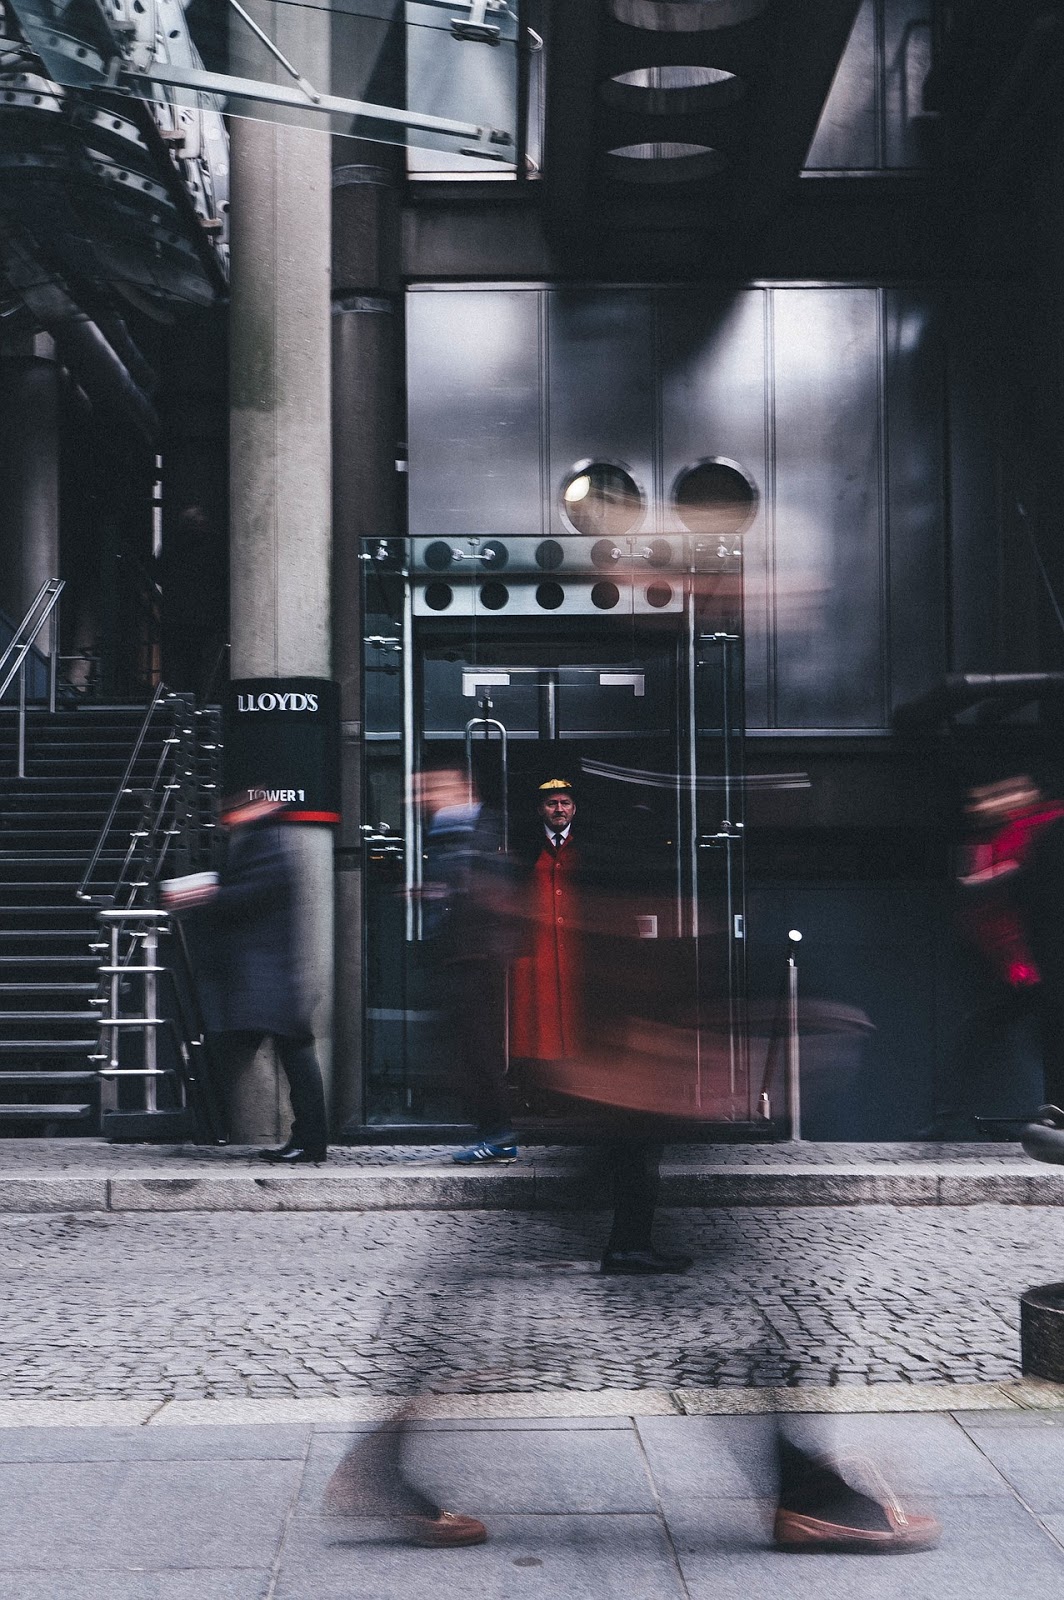
Candid Urban Photography
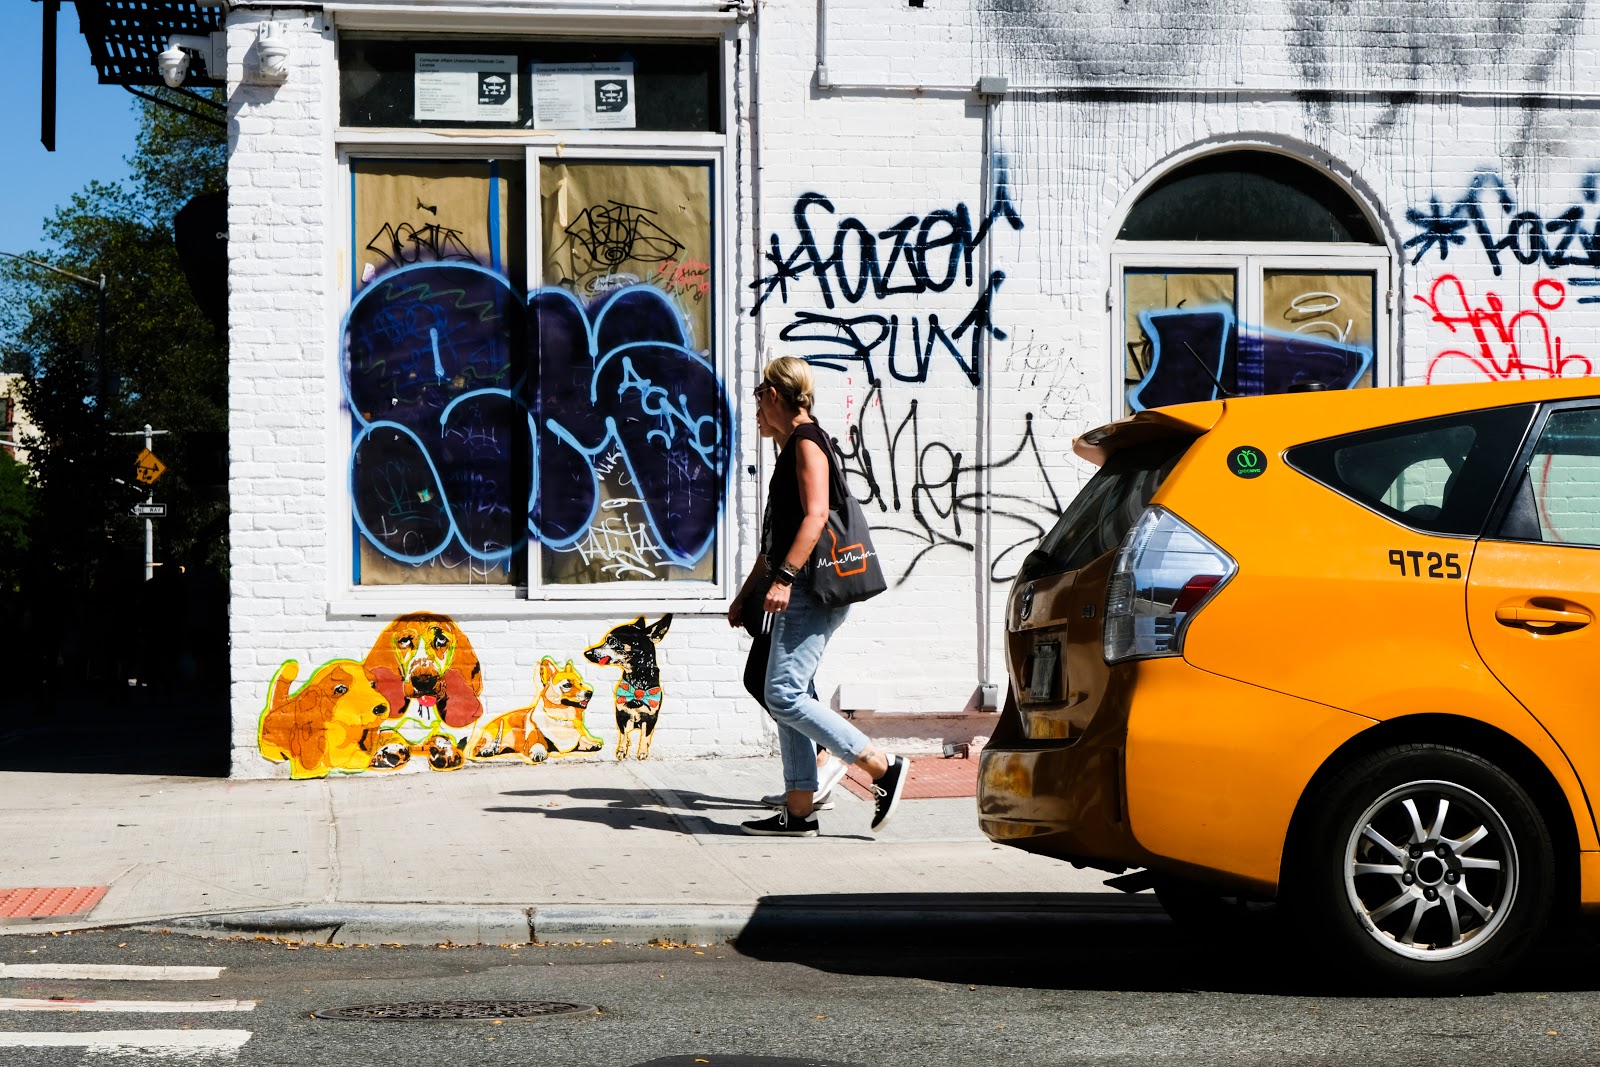
Photo Credit: Dan Ginn
Candid Urban Photography is the style that most resembles street photography. The above photograph was taken in downtown Manhattan, on the outskirts of the more populated areas.
So, what makes this an urban shot?
Firstly, the exposed brickwork of the building gives the image an edgy, rural aesthetic. Combine that with the graffiti and you begin to get an artistic, urban vibe. The human element makes the shot candid, as people are unknowing participants in the photograph, giving it an extra layer and more context.
While the use of bright color is not exclusive to urban photography, having it within the frame makes the photograph pop more, making it more attractive to the eye.
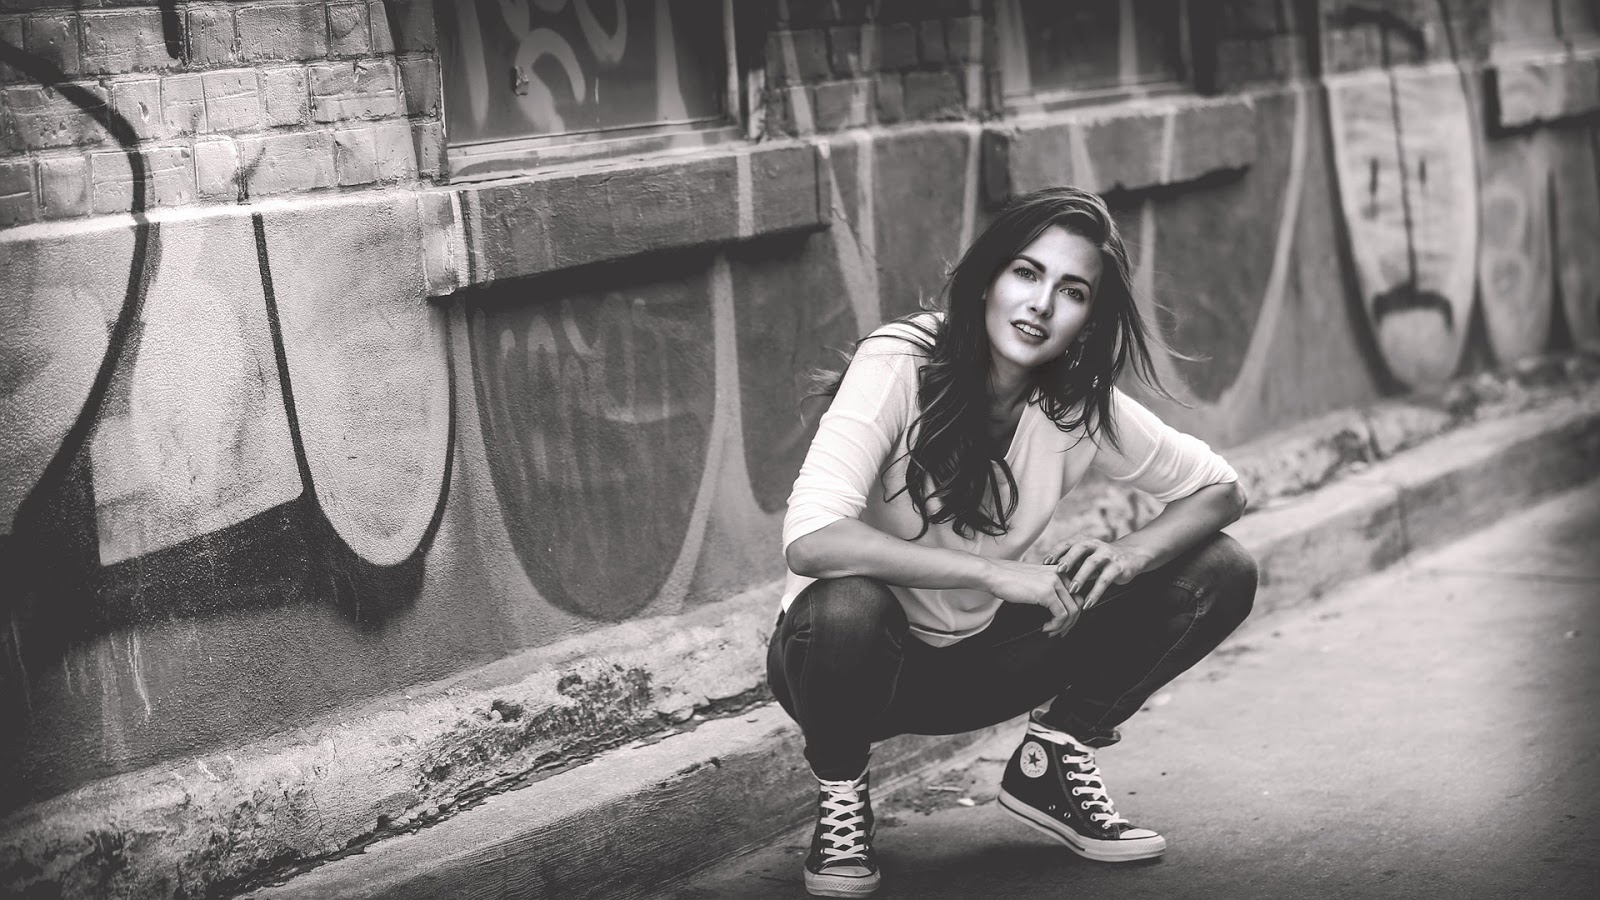
Urban Portrait Photography

Photo Credit: Dan Ginn
This photograph is from a preplanned photoshoot. It’s set in the back streets of London, where you often find derelict buildings that are perfect for creating an urban theme.
Again, the exposed brickwork is a key player in this image. As are the shadows from the metal fencing, that are included to create shapes and drama over the two main subjects. The dark tones add an extra layer of an urban mood, providing a rustic undertone to the urban street style shot.
How to Get Started in Urban Photography
Getting started in urban photography is easy. Unlike other genres of photography where you need a range of equipment, with urban photography all you need is a camera and plenty of ambition.
The best tip to get started is to go out and shoot.
Honestly, the biggest barrier people have with urban photography is having the confidence and motivation to actually get outside and create the images. While you should set high standards for yourself, don’t put too much expectation on your shoulders too soon.
Becoming good at urban photography takes time. It requires a lot of effort, failure, and learning. So what if you don’t create amazing photographs right away? The fact you’re getting out there is
more than what most do, that’s a win in itself.
Also, learn to enjoy the process. In photography, people become so focused on the end goal. In this case, it is, of course, the image. But what about everything leading up to that point? The walking, the of scouting locations, the analysis of a scene, right through to deciding to take the shot?
All of that is important, and it’s fun. If you can learn to enjoy each point of the full process then you will last a long time in urban photography. And in time, the quality will arrive and from that point, the sky’s the limit!
It’s also wise to research the work of other, more established, photographers. Be careful not to just copy their work, but rather, use it as a way to influence your own. A good book for your reading is Urban Photography by Tim Cornbill. It offers a 193-page look at the genre of urban photography.
Urban Photography Tips
Here are some tips and ideas to help you gauge an idea of how to make compelling urban photography.
Know Your Areas
A very important part to capturing great photographs is knowing where to find them. To do that you need to become an expert in the urban parts of your area, and beyond if you intend to travel.
Using Google Maps is a great way of saving locations, making it easier for you to navigate when you get out to shoot.

Also, save locations that you stumble across randomly. The more you know where you’re going, the less time you need to spend on navigation, and the more time you can spend on shooting.
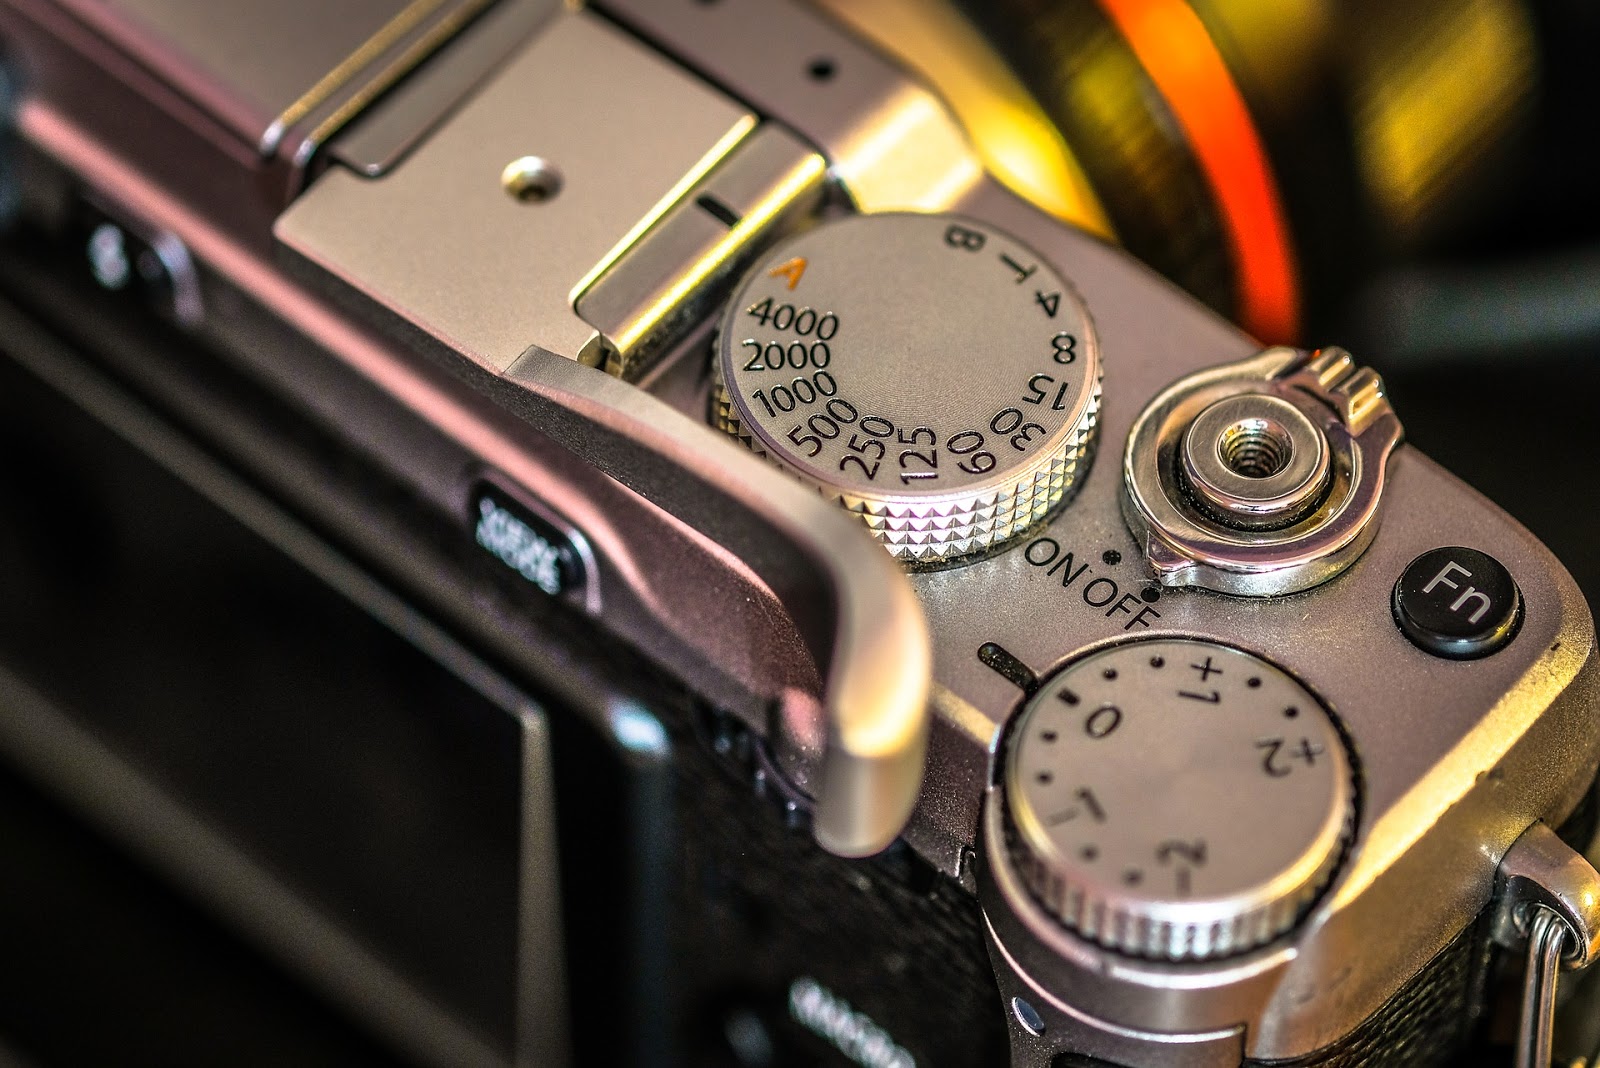
Know Your Camera Settings
Urban photography can move at a fast pace. Because of this, it’s crucial that you can set the right camera settings quickly and easily.
To do this, we recommend shooting in Aperture Priority mode. Don’t be too proud to step of Manual mode, it does not make you any less of a photographer.
Because light changes quickly, only having to focus on the aperture settings means you have a better chance of getting the correct exposure when shooting urban photography.
If you would like to add some motion blur to your images, then set your camera to Shutter Priority mode.
Slow shutter speeds are what’s needed in order to add blur to images. To achieve this, always shoot at a shutter speed slower than your focal length. For example, if your focal length is 35mm, then shoot at a shutter speed 1/35th of a second and slower.
The slower your shutter speed the more blur you can expect in your photograph.
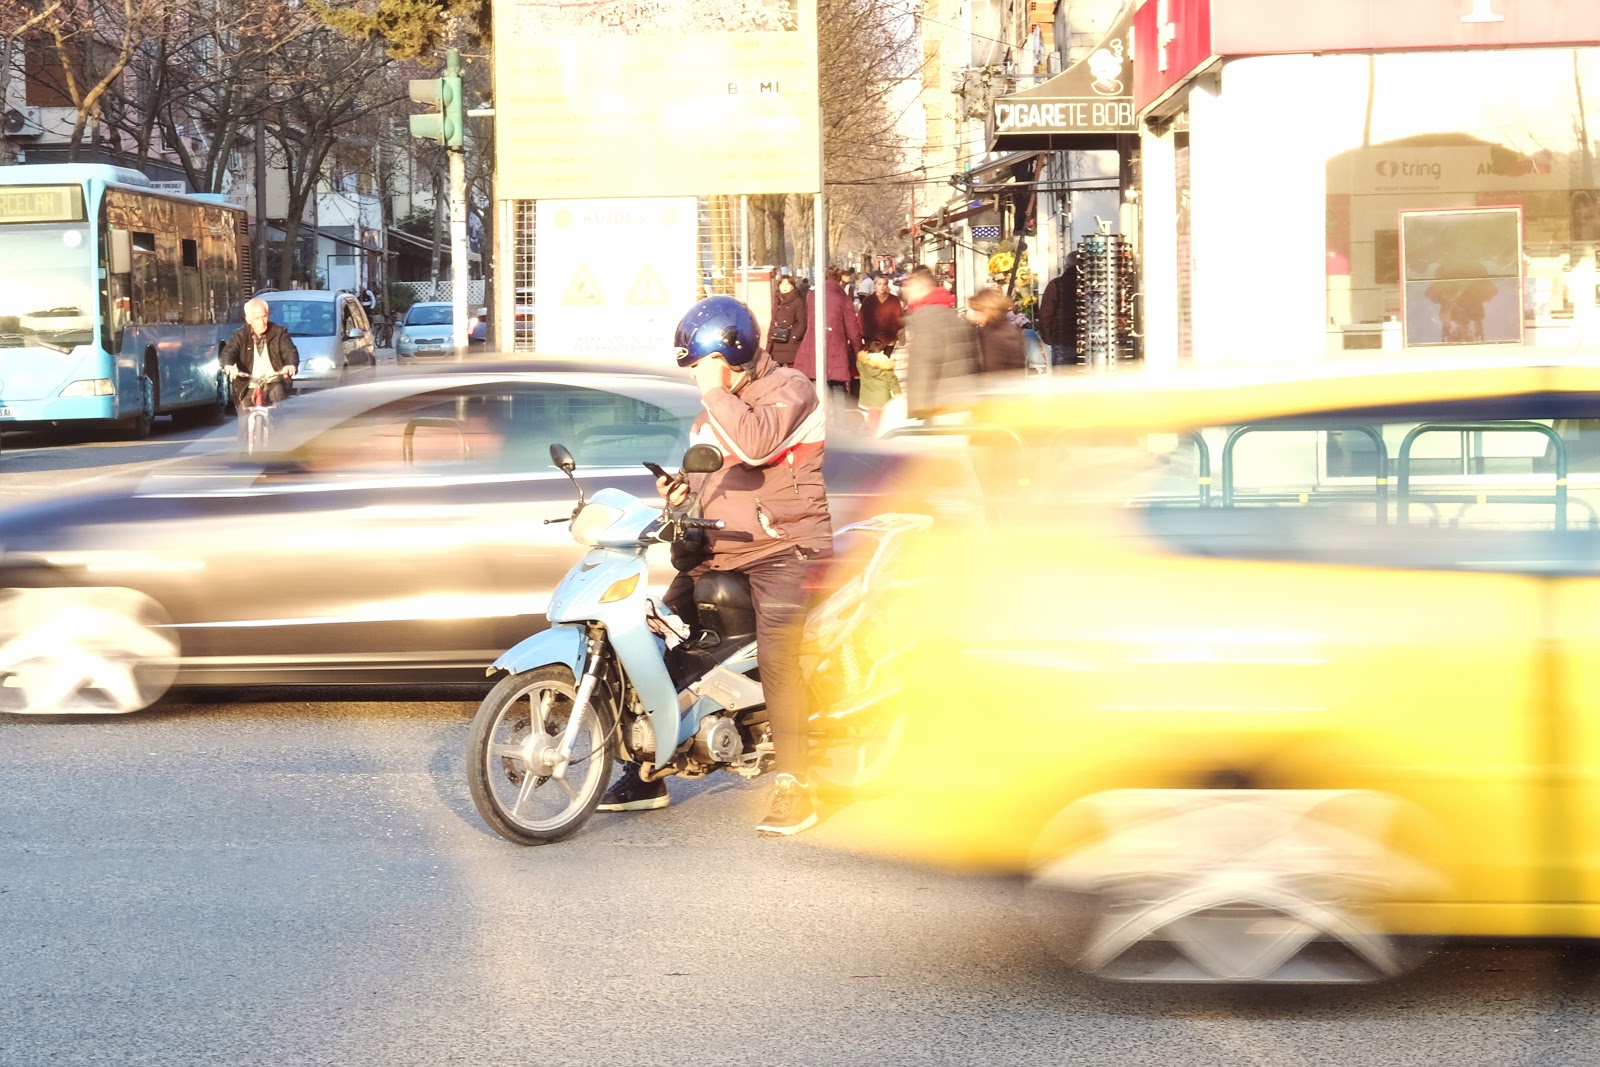
Photo Credit: Dan Ginn
For sharp images, select an f-stop between f/8 – f/16. This allows for more of your image to be in focus and keeps everything crisp and clear.
Look For Relationships
Looking for relationships is the process of identifying two or more components within a frame that add to your main subject. These components then work in conjunction with one another to make the image more compelling for the viewer.
Here’s an example below with a shot of the Empire State Building:

Photo Credit: Dan Ginn
Because of its history and size, The Empire State Building is impressive in itself. But there are millions of photographs of the iconic monument, and alone it’s just another photograph of something people have seen before.
But with the American flag, flying high alongside it, the image starts to tell a story. It’s a photograph that highlights the strength of the world’s largest superpower. The American flag flows proudly in front of one of the countries greatest architectural achievements.
That subtle addition to the photograph gives it more depth, especially with the flag being in the foreground and the Empire State Building in the background. This is why looking for relationships within your frame is important. Here’s an exercise for your next shoot…
When you find an interesting subject, before taking the shot, look around the frame and try to identify something that can work well with it and make your image better.
Looks for pairs, juxtapositions (two things placed side-by-side for comparison), for example. If you can’t find a relationship, don’t take the shot and move on to the next scene. This will train your eye to be more observant when shooting.
Know Your Lighting
When shooting urban photography, you will have to work with the light around you. This is means you will have little to no control over the quality and kind of light available. Most often, you’ll be working with a natural light source.
Knowing the different types of light and what you can do with them creatively will help you take better shots. Here are some different types of light and how you can best utilize them for your photography:
Bright Sun
A bright sunny day, with a clear sky, can be both problematic and advantageous. If you’re planning on doing an urban portrait shoot, for example, harsh bright light is your worst nightmare.
If you place your subject facing the sun, they will struggle to see and start to squint. If you put them with their back to the sun, they will become silhouetted and underexposed in the image. You can use off-camera flash and reflectors to combat this issue, but not every photography has access to these tools or the experience yet to use them properly.
However, for candid and urban geometry, bright light is your best friend. Because of buildings in the area, the bright light will create deep, dark shadows. The contrast between the highlights and shadows makes for some really artistic photography. See the example below:
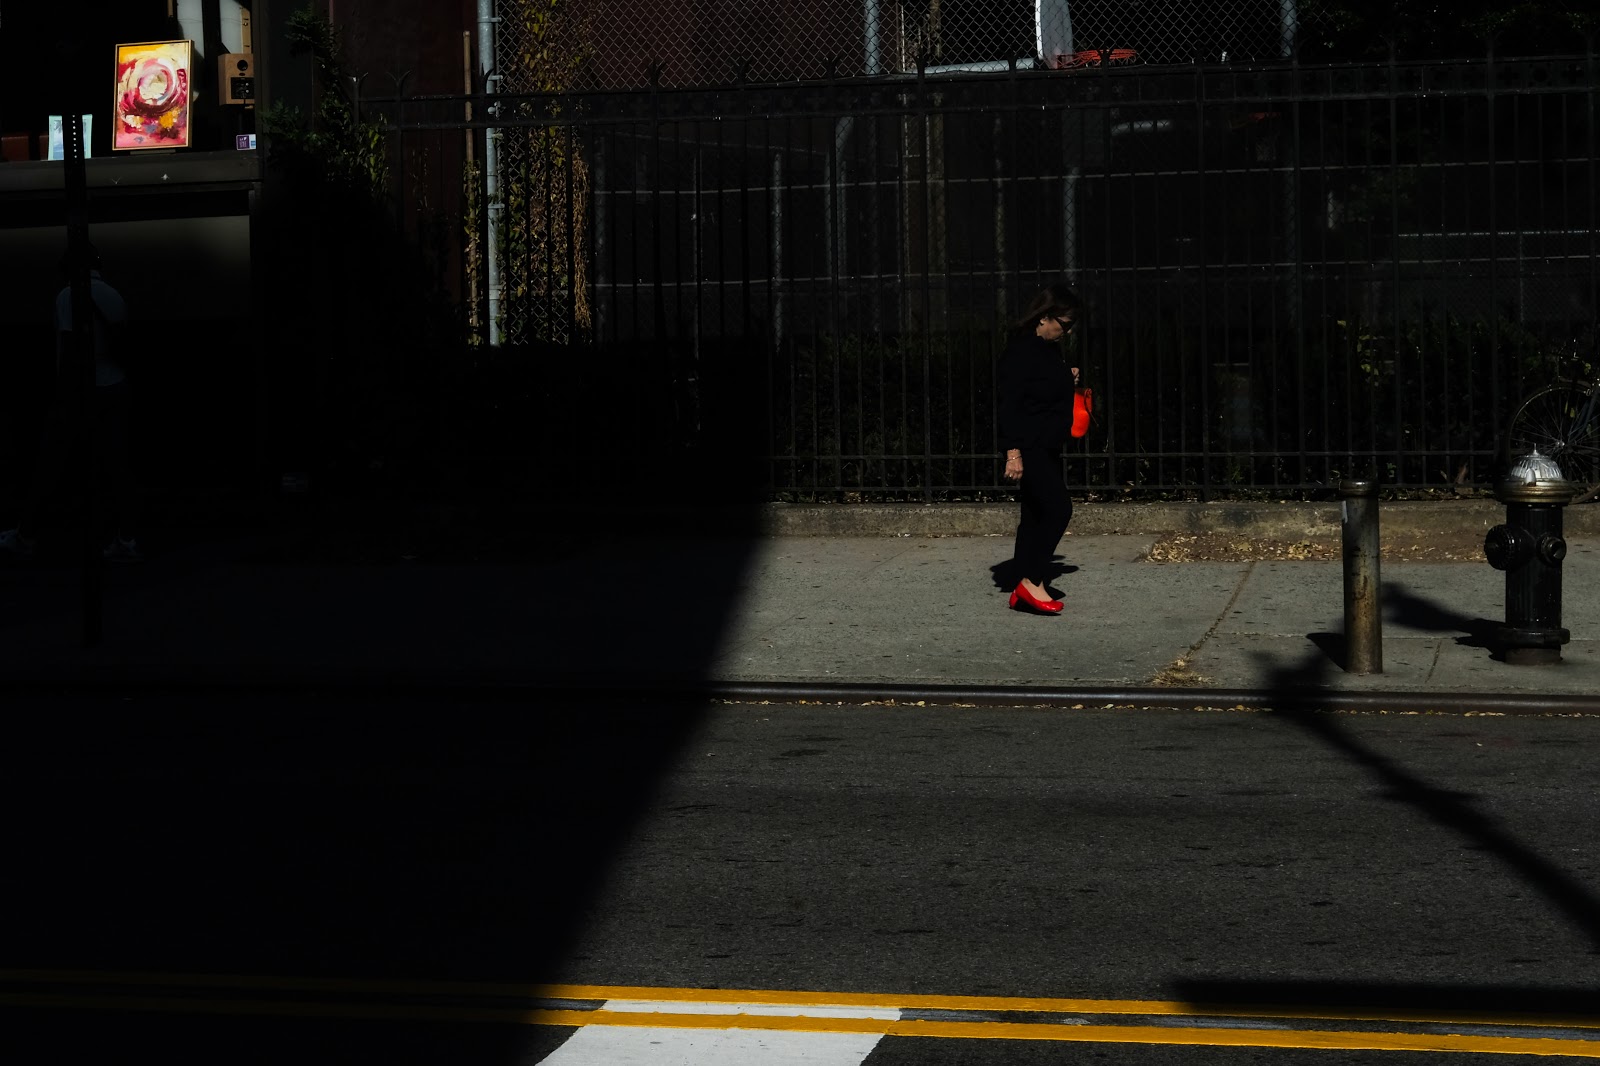
Photo Credit: Dan Ginn
Bright Overcast Day
A bright cloudy day doesn’t offer the most creative light, but it does have other benefits. The clouds act as a huge softbox for the light source (the sun) and create softer, more evenly spread light.
This is the best time to get out and shoot some urban portraits as your subjects will be lit well and you can also incorporate the urban environment without the distraction of harsh light.
For candid shots, you lose the element of creative light. This isn’t a bad thing as your photography should be more dynamic than just highlights and shadows. But you will need to ensure your subjects are really worth photographing, otherwise, you risk having flatly lit, uninteresting photographs…
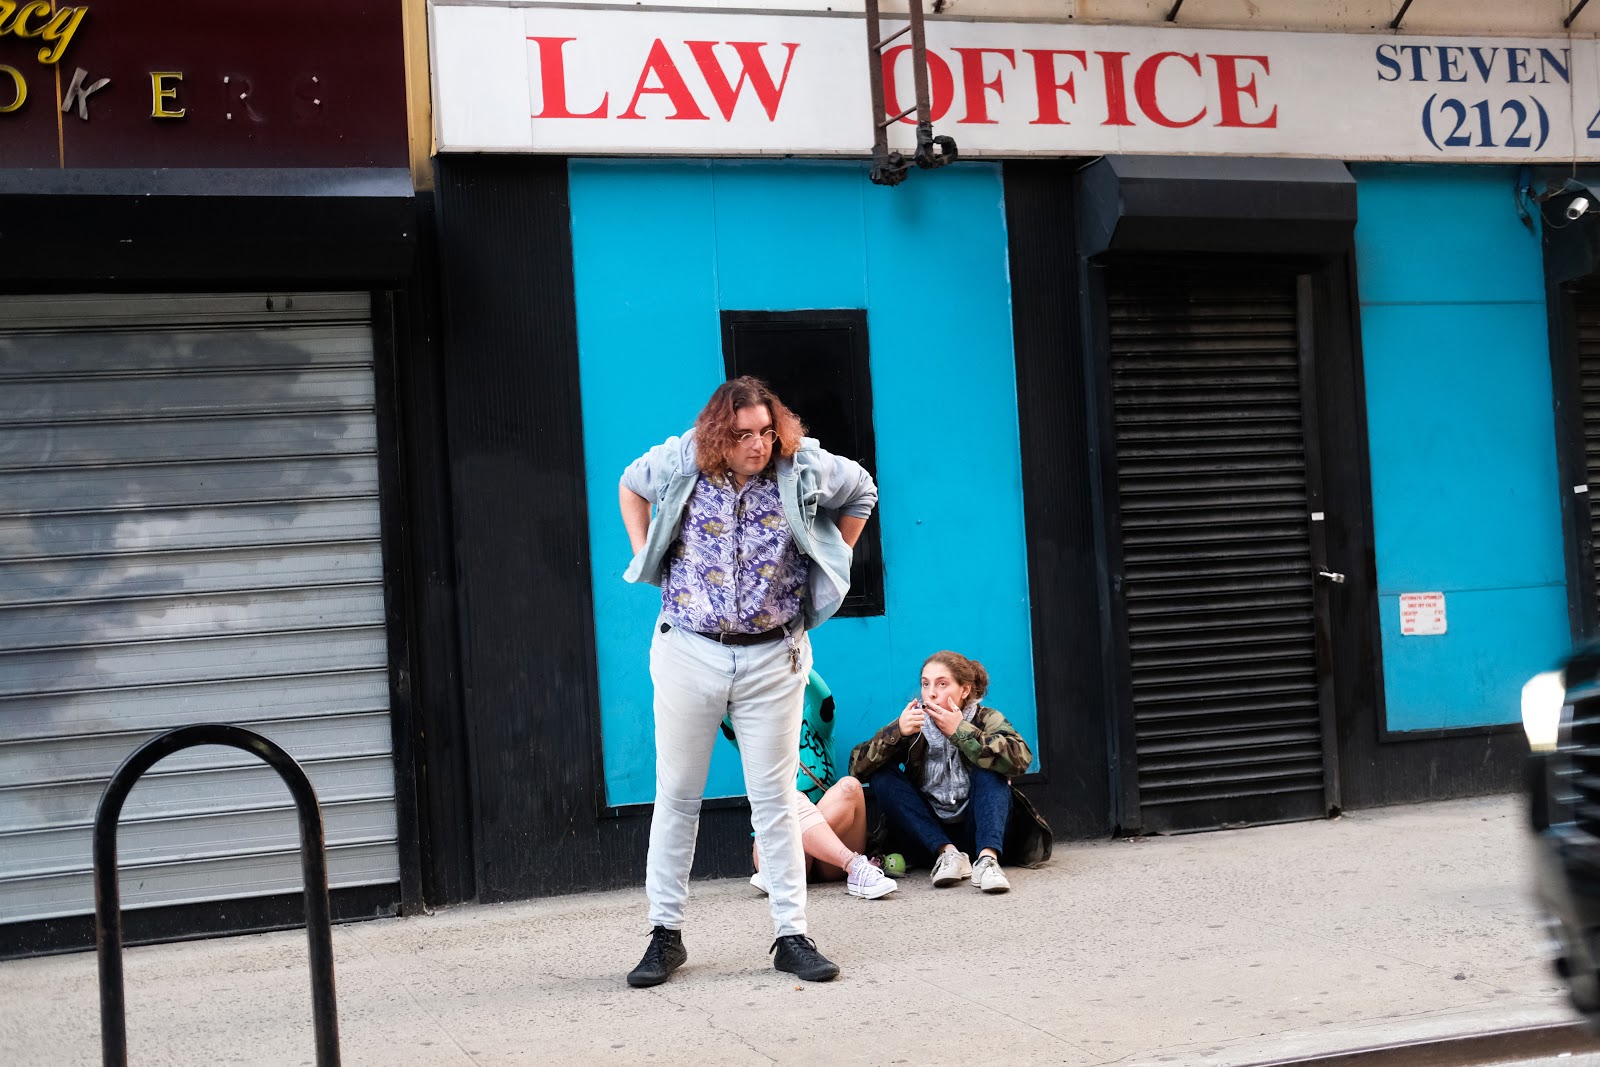
Photo Credit: Dan Ginn
Shooting at Night
Don’t make the mistake of thinking urban photography is only reserved for day time shooting.
Even if you don’t have an external flashlight, you can still shoot at night. There are plenty of light sources that can illuminate your subjects.
Areas that have lots of neon lighting are wonderful for all types of urban photography. The variation of color, along with a strong subject, creates some of the best urban photography to go out and shoot.
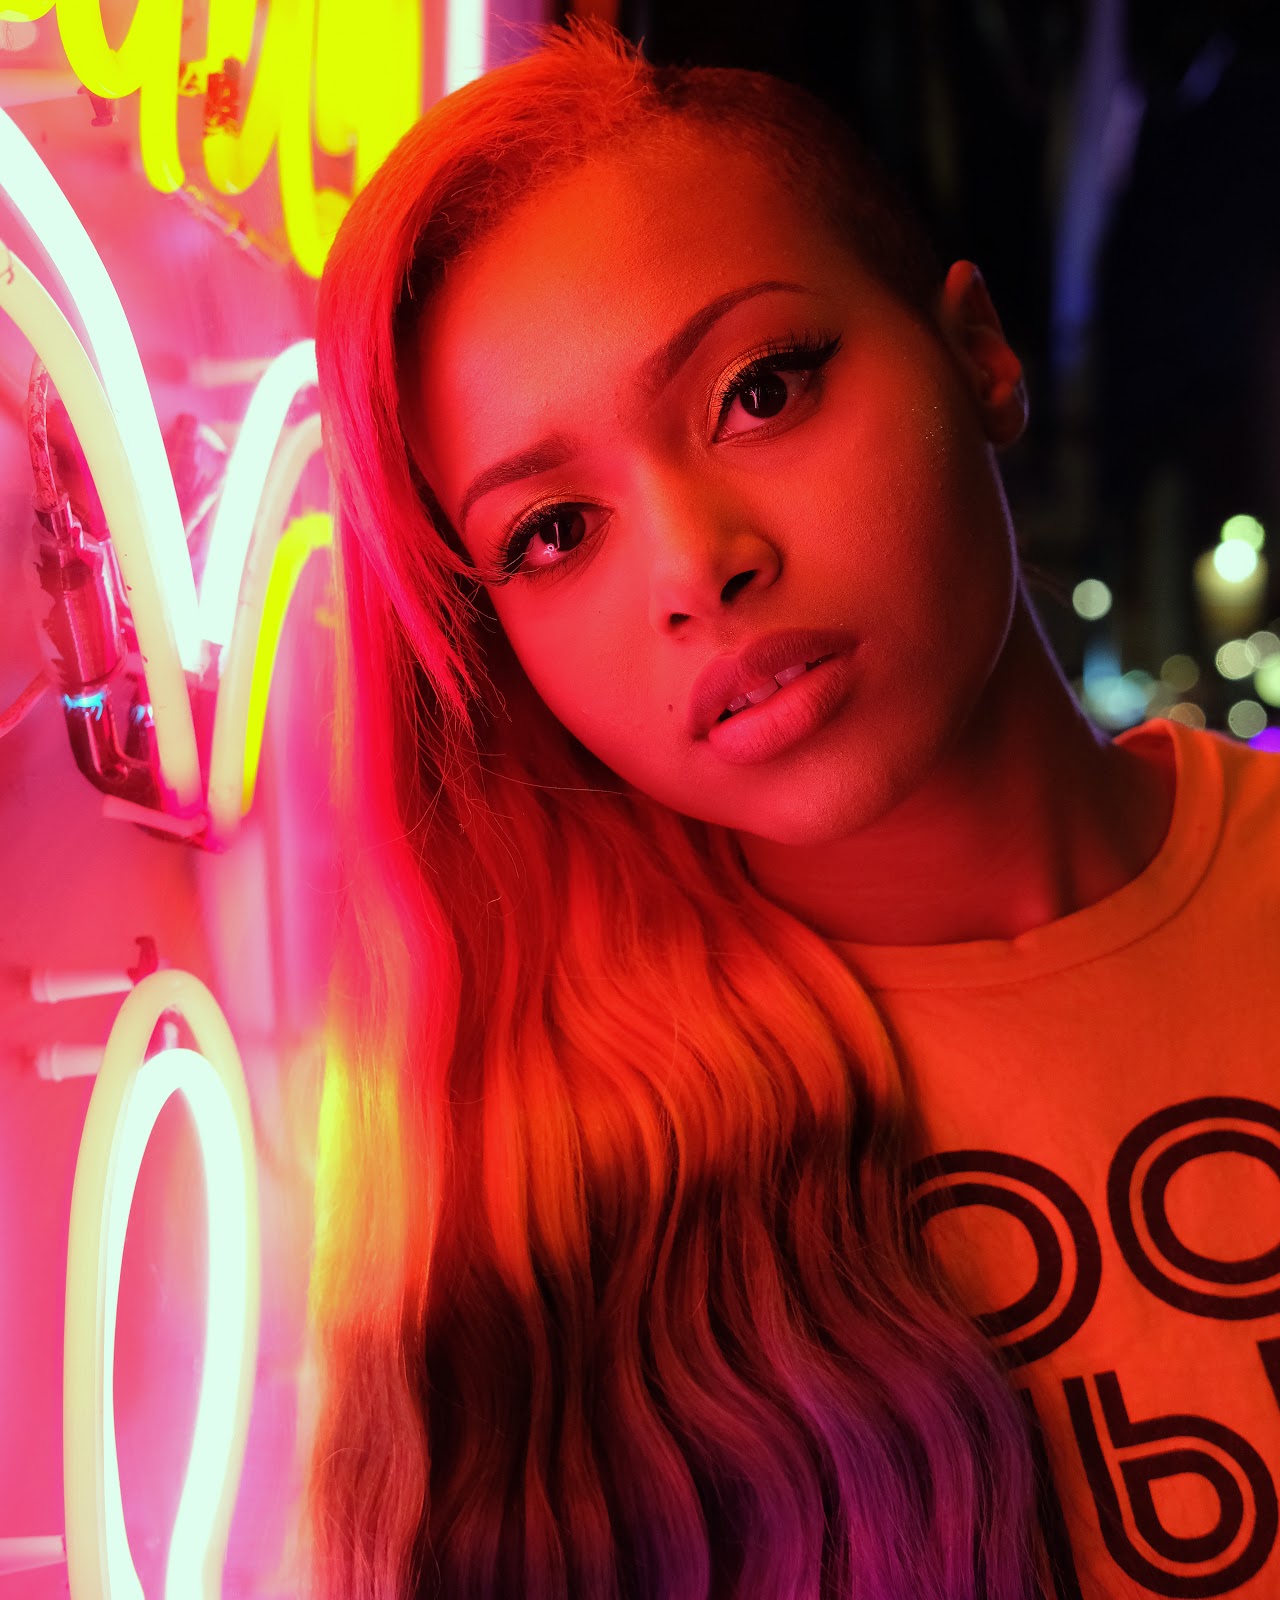
Photo Credit: Dan Ginn
Also, don’t be afraid of bumping up your ISO. Today’s cameras can be set at a high ISO without adding too much grain to your photograph. Even still, don’t be overly worried about grain. For gritty, urban styles, grain can actually be a fantastic addition to your photograph.
Recommended Gear for Urban Photography
“The best camera is the one you have in your hand”, as the popular saying goes among photographers…
There’s a good argument to say that the quote is correct. However, it’s also true that certain types of cameras will help you to achieve the photographic results that you want.
For urban photography, it’s best that you have something small in size and light in weight. You will be doing to do a lot of walking. Having a big heavy camera and lens will put a lot of pressure on you. The consequence of this is that you probably won’t shoot for long periods or you will risk muscle pain.
Mirrorless cameras are your best option.
They are small but can still produce the same, if not better, quality photographs as DSLRs. Brands such as Fujifilm, Sony, and Nikon all have fantastic mirrorless options that are popular amongst the urban photography community. The most important aspect of your gear is the lens that you use. Here are some of the types of lenses that will suit you best in different circumstances.
Wide-Angle Lens
A wide-angle lens tends to range from 16mm – 28mm. This type of lens is perfect for those of you that want to photograph the urban landscape. It allows you to capture more of the scene, without adding too much distortion to the frame.
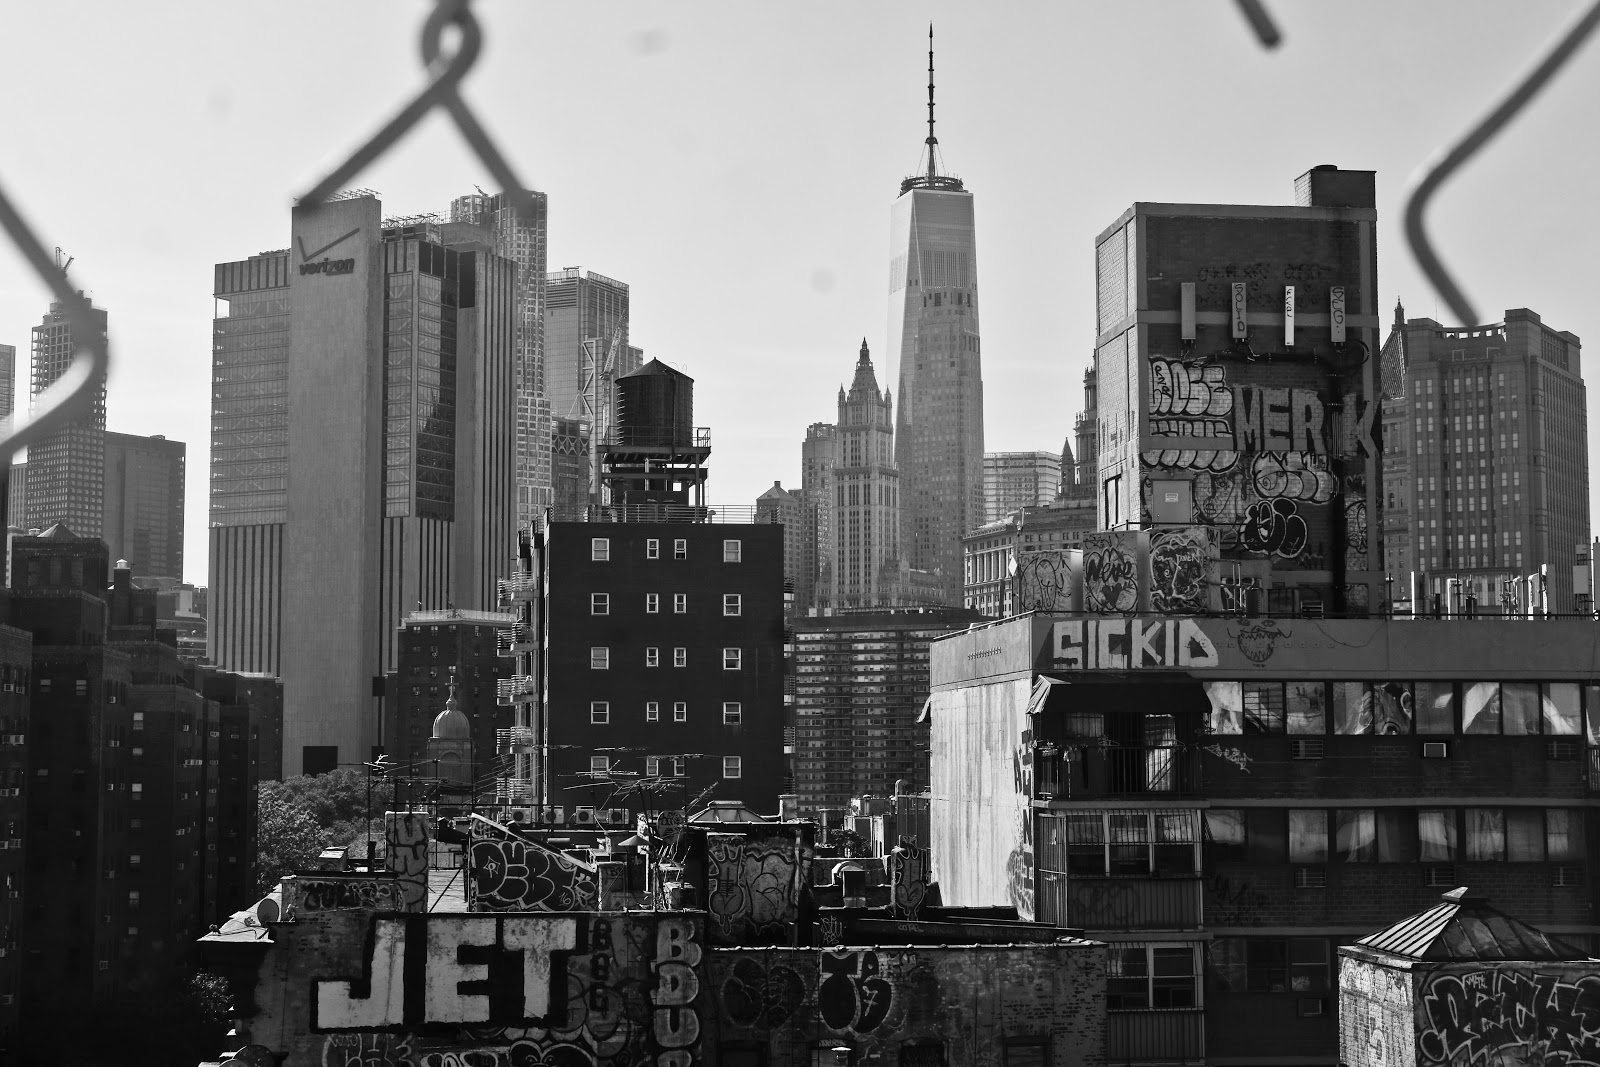
Photo Credit: Dan Ginn
Standard Lens
A good 35mm and 50mm should be used for your candid urban photography. 50mm tends to create images in the same fashion as what the eye sees. Both a 35mm and 50mm will allow you to have depth and context in your image.

Photo Credit: Dan Ginn
Telephoto Lens
We would advise you not to use a telephoto lens for urban photography. They’re big, heavy, and not well suited to this genre of photography.
If you’re shooting architecture, they don’t allow you to get much into the frame. For candid photography, a telephoto lens is easy to spot and will bring you lots of unwanted attention.
This kind of lens is best suited to wildlife or sports photography, or other situations where the photographer is unable to get close to the scene and subject. This is unlikely going to be the case with urban photography.
Primes or Zooms?
The great lens debate; Primes or Zooms?
On the one hand, prime lenses tend to be sharper, while on the other, zoom lenses provide you more flexibility. With a prime lens, you’re encouraged to get closer to your subject, it certainly makes you think more about your scene and your angle of view. But because a zoom lends you more range, it means you can capture the shot quickly and without as much hassle.
For inexperienced shooters, it’s best to get a zoom lens that ranges from 18mm-55mm (a standard kit lens). But more advanced photographers should opt for a prime lens such as a 24mm, 50mm, and 85mm.
Become a Better Urban Photographer & Have Fun!
Urban photography may be challenging at first for those new to the style. Capturing city buildings, people, and geometric shapes in a visually compelling way and/or in a way that tells a story beyond the picture itself, can take time (just like many other styles of photography).
It takes practice and experience to know what to look for and how to capture the best scenes. Using the tips and knowledge above, though, will help you get started. It’s up to you to take it from there and challenge yourself.
But remember, photography is all about having fun.
Yes, you should take it seriously and always aim for high standards, but if it’s not enjoyable then what’s the point? Put on some comfy shoes, get ready to explore, and start creating some awesome urban photography!
10 Tips to SELL Your Used Camera Gear FAST