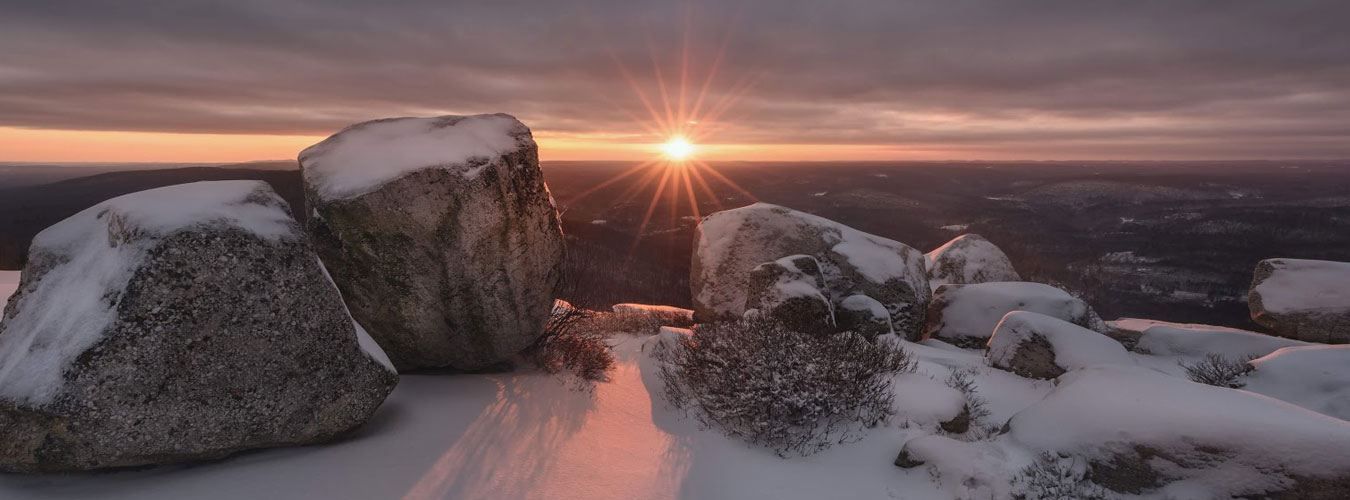
The Ultimate Guide to Winter Photography
Winter is a fabulous time to tackle new photography projects, learn fresh skills, and capture some amazing images, but it does pose a few challenges, especially for the outdoor photographer.
Whether you’re a novice, just learning the ins and outs of your camera, or a professional honing your skills, winter is the perfect teacher. This winter photography guide will help you stay warm, keep your gear in top form, and encourage you to shoot more creatively, despite the challenges of winter weather.
Read on or use the links to below to “jump” to each section:
- Winter Photography Tips
- Recommended Camera Settings
- How to Take Winter Portraits
- Tips for Keeping Warm & Protecting Your Gear
- Winter Photography Ideas
- Recommended Gear
Winter Photography Tips
Cold weather, harshly reflected sunlight, and snow are just a few of the challenges you’ll face as a winter photographer. Fortunately, none of these issues are deal-breakers — you just need to make a few adjustments to achieve the best results. Here are some general tips for taking better photos in the winter.
Shoot in RAW
Shooting in RAW format allows your camera to transfer all the information from the scene you’re shooting into a file that can be accessed during post-processing.
A JPEG file, by contrast, is a compressed file. The information included in a JPEG file is based on your camera’s settings when you click the shutter. Any additional information that has been gathered is discarded in order to save space.
Edits that are easily achieved with RAW images can be impossible to do with JPEG files.
Because winter conditions can often trick your camera into blowing out highlights, underexposing images, or giving everything a bluish tone, shooting in RAW provides more editing flexibility.
Shooting in JPEG will result in smaller files, but it can be nearly impossible to fix improper white balance or exposure issues in your JPEG photo. Photography Concentrate has a great overview of shooting in RAW versus JPEG, and how it affects the editing process.
Use a Versatile Lens
Photo credit: Tara Schatz
When the temperature drops below freezing, the last thing you want to do is to change lenses in the field. Choose a versatile, multipurpose lens that can capture a variety of shooting situations. A 70-200mm works really well for capturing winter landscapes, portraits, and wildlife.
Focus Your Winter Shots Manually
Falling snow, scenes with little contrast, and foggy, overcast lighting will play tricks with your camera’s autofocus. To ensure crisp shots with a focal point of your choosing, switch over to manual focus.
Bracket Your Shots
One of the trickiest aspects of winter photography is achieving the correct exposure. Bright, snow-covered scenes tend to dominate your camera’s meter exposure reading, which will often underexpose your shots.
While you can certainly set your exposure value to +1 to compensate, bracketing exposures while out in the field will give you more choices when it comes time for post-processing. For an in-depth look at exposure bracketing, check out this article on Picture Correct.
Use a Polarizing Filter
Using a polarizer during bright, snowy conditions will reduce glare and add some contrast and drama to your sky.
The most common type of polarizing filter is screwed on to the end of your lens. It provides your lens with additional protection from moisture and damage, and can be turned in the field to achieve many different effects.
Get Out Early
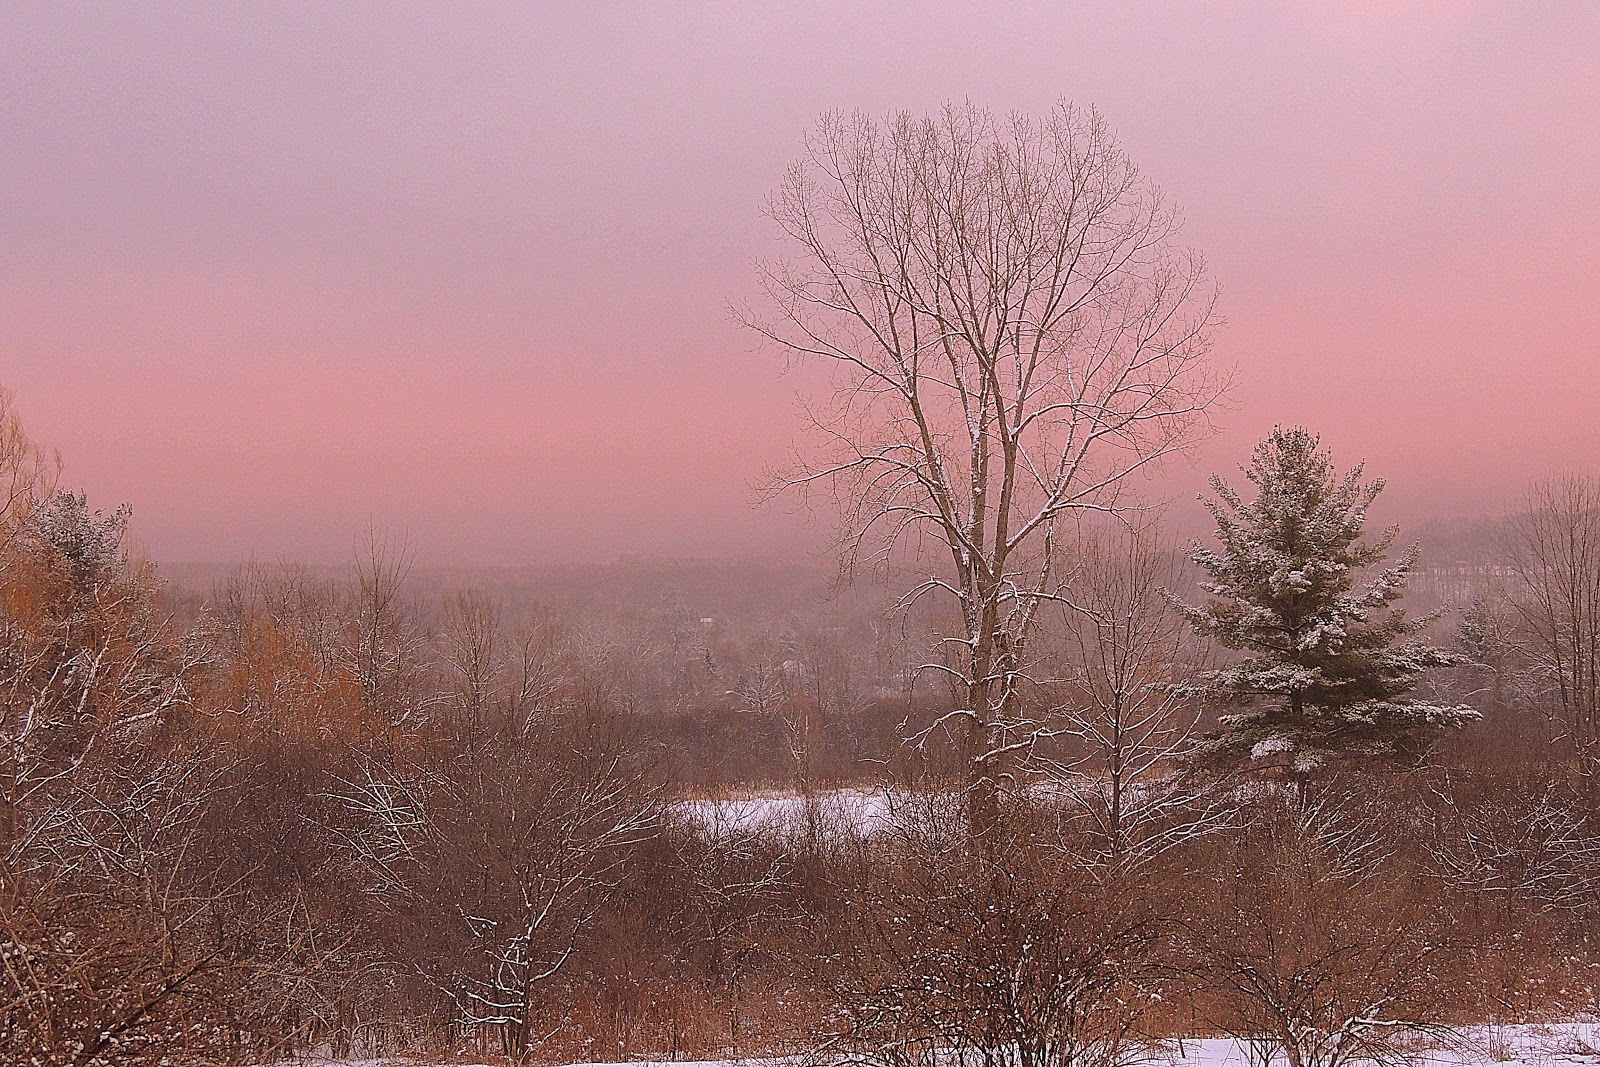
Photo credit: Tara Schatz
If you’re hoping to capture a beautiful, snowy scene, your best bet is to head out immediately after the snow stops, or even when it’s still falling.
Snow is a fickle creature, and once it blankets the ground, that snowglobe landscape will quickly turn a dingy grey and be marred by footprints, especially if you’re shooting in urban areas. The Golden Hour, shortly after sunrise or before sunset, is the best time to capture warm winter lighting. For frosty macro photography, head out at first light.
10 Tips to SELL Your Used Camera Gear FAST

Camera Settings for Winter Photography
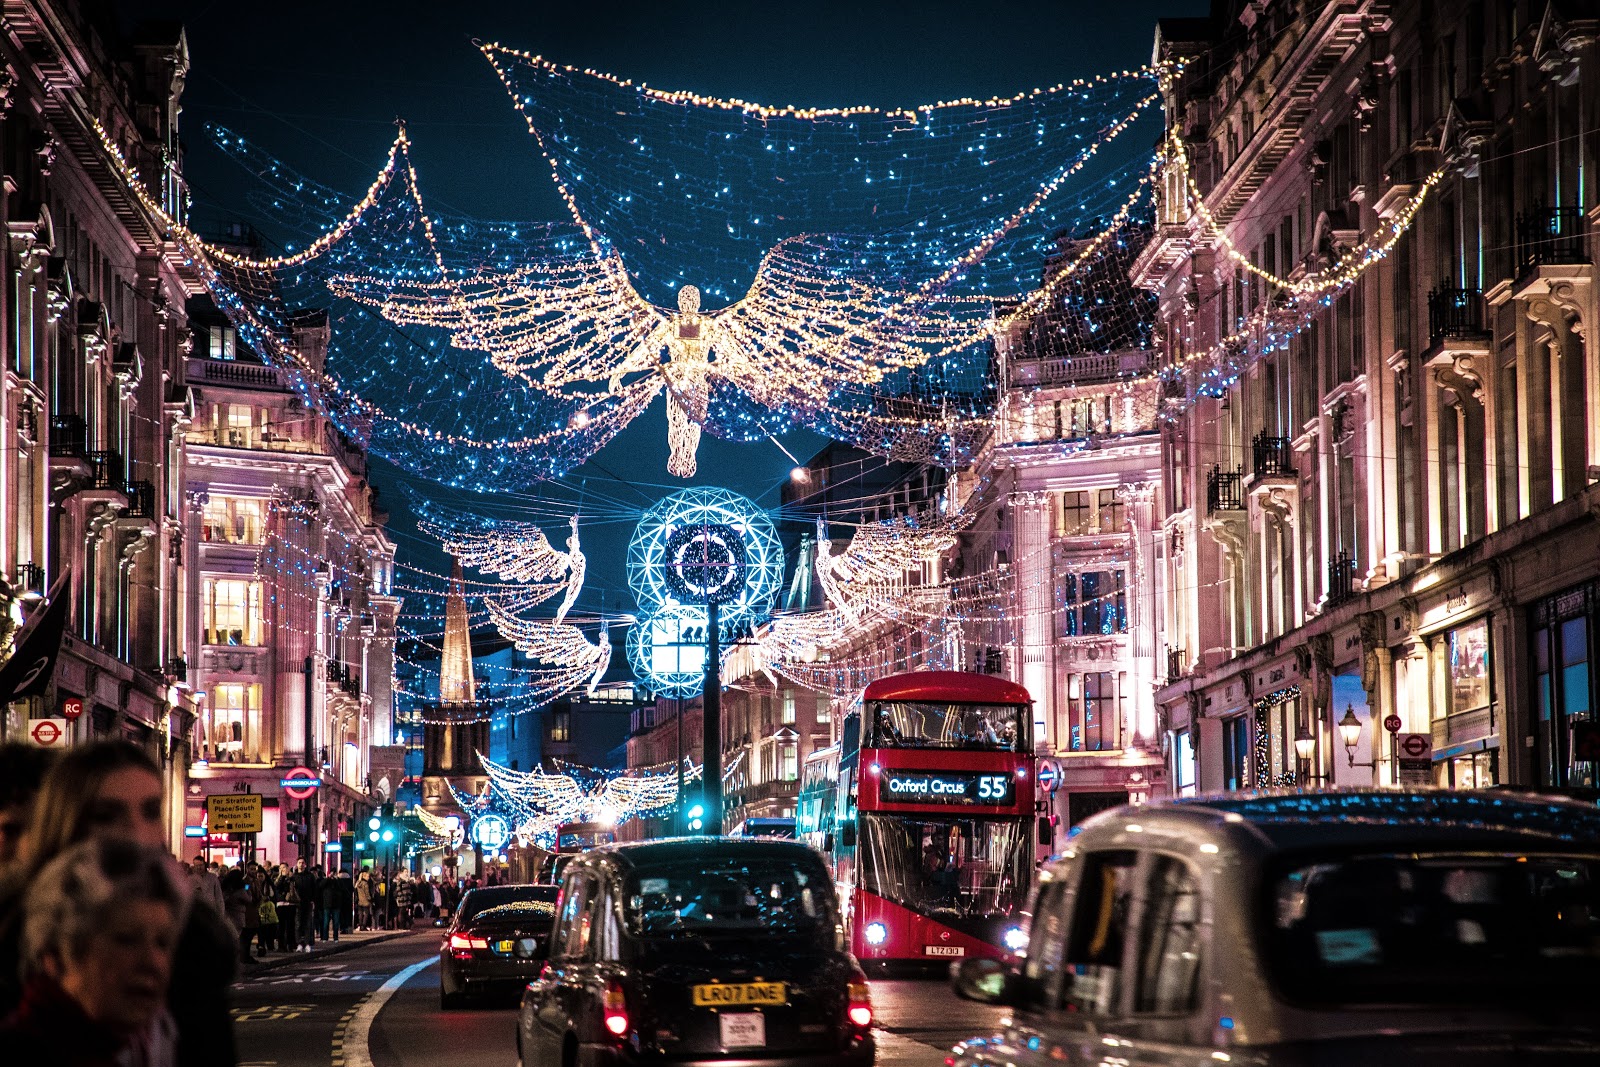
Photo credit: Jamie Davies on Unsplash
While auto settings are great for snapshots, you will rarely capture winter’s drama without some manual adjustments. There is no time like a long winter to get familiar with your camera’s manual settings.
Sit down and read your manual, take some notes, and practice what you’ve learned. There are no hard, fast rules for which settings work best in a given situation. The best method is to experiment and see what works. Use the following tips as a starting point for adjusting your camera’s settings, but don’t be afraid to play around and have fun.
- Exposure – We’ve already talked a bit about exposure, and while I definitely suggest bracketing your shots, you should also count on underexposed photos, at least when you’re shooting bright white snow. Use your camera’s histogram and adjust your exposure dial up a bit to compensate.
- Shutter Speed – Shutter speed depends entirely on the effect you’re after and the conditions you’re shooting in. Fast shutter speeds will stop motion, and they are useful for freezing the falling snow, shooting in windy conditions, and capturing snowsports and wildlife. Gently falling snow may require a shutter speed of 1/150 to freeze motion. Blizzard conditions may require 1/350 or more. Slow down your shutter speed, and snow will appear as streaks of white across the frame, creating beautifully moody scenes.
- White Balance – Auto white balance in snowy conditions will often lead to photos that are tinged with blue. The easiest way to remedy this is to set your white balance to the shady or cloudy setting. If you’re shooting in RAW, you will be able to further adjust the white balance in post-processing.
Taking Winter Portraits
Photo credit: Tara Schatz
Winter is one of the best times to capture beautiful portraits, provided you plan ahead. The evening golden hour comes early in the winter—as early as 2 p.m. in some locations. Even cloudy days have the potential for magical and moody captures that you wouldn’t normally expect.
Many of the settings for winter portraits will be similar to those for general winter photography, and of course, experimenting is important for achieving your desired results. Here are a few winter portrait tips to help you make the most of the cold temperatures and snowy landscapes.
- Add some color to your scene. Whether it’s a hat, a scarf, or an umbrella, a little pop of color will add liveliness to what may otherwise be a dull scene.
- Make use of backlighting. Winter light can be absolutely magical, especially when it reflects on glittery snow. A little backlighting and a shallow depth-of-field will create beautiful bokeh and warm highlights.
- Keep your model warm. It’s impossible to look or feel relaxed when you’re cold. Encourage your model to dress for the weather, with warm gloves, a scarf, and a hat. Bring along a thermos of hot chocolate, extra blankets, and some packets of hand warmers, just in case.
- Use spot metering and bracketing. Shooting in winter conditions will likely cause some of your scene to be underexposed. Using spot metering will ensure that the subject’s face is exposed properly, even if the rest of your scene isn’t. Bracketing your shots is useful when the ever-changing light is causing you to question your exposure settings. As long as your model’s face is properly exposed, the rest can be adjusted in post-processing.
- Have fun. Winter is the perfect time to experiment with playful poses. Ask your models to play in the snow, meander through the forest, or frolic in the park. Snow has a way of bringing out the child in everyone.
Tips for Keeping Warm and Protecting Your Camera Gear in the Winter
Photo credit: Tara Schatz
Winter photography can be a lot of fun, but certainly not if you’re fingers turn blue, your lens is always fogging up, and you get water inside your camera’s computer.
Keeping your gear protected is just as important as framing that perfect shot, and if you’re not comfortable, you’ll have zero interest in shooting creatively. Here are a few tips to ensure that you love every minute of your winter photo shoot.
Bring Extra Batteries and Keep Them Warm
When the outdoor temperatures drop below freezing, your camera’s battery will drain very quickly. The colder the temperature, the faster your battery will be depleted.
Be prepared with one or two fully-charged batteries, and keep them in an inner pocket so they will last as long as possible. Lithium-ion batteries perform the best, followed by NiCad and NiMH. Avoid alkaline batteries altogether, as they perform very poorly in the cold.
Keep Your Camera Cold and Dry
Most modern DSLRs are designed to work at freezing or below-freezing temperatures without a problem, with the main issue being a quickly depleted battery. The bigger problem will be moisture.
Try not to breathe on your camera when shooting, and if your LCD screen does fog up, use a microfiber cloth to wipe it down. Don’t keep your camera inside your jacket, as the change from cold to warm and back to cold will create additional condensation on your camera.
Lastly, if you are shooting in wet snow or other damp conditions, consider using a heavy-duty plastic bag or a rain cover to protect your camera’s internal components.
Move from Cold to Warm Conditions Very Carefully
When you bring a cold camera into a warm space, moisture will immediately begin to condense onto it, or even inside it. You can prevent this by slipping your camera into a protective bag before you bring it inside.
Let it come to room temperature before you remove your camera from the bag. If your camera does develop condensation or moisture, remove the batteries, and let it completely dry out before trying to use it.
Dress for the Weather
Dressing for winter photography is just like dressing for any winter activity in the outdoors—you need to wear warm layers, wool socks, and sturdy footwear.
Protect your hands with a lightweight pair of touchscreen gloves, followed by a pair of over-mittens that you can take off when you’re ready to shoot. Lastly, tuck a few packs of hand-warmers in your pockets to keep your fingers and your batteries toasty.
Bring a Friend, or at Least a Cellphone
Winter conditions make for beautiful photography, but dangerous driving and hiking conditions. Bring a friend on your photo expedition for double the fun.
If you must go alone, be sure to tell someone exactly where you’ll be and when you’re returning, and don’t forget to pack a fully-charged cell phone in case of emergencies.
Winter Photography Ideas
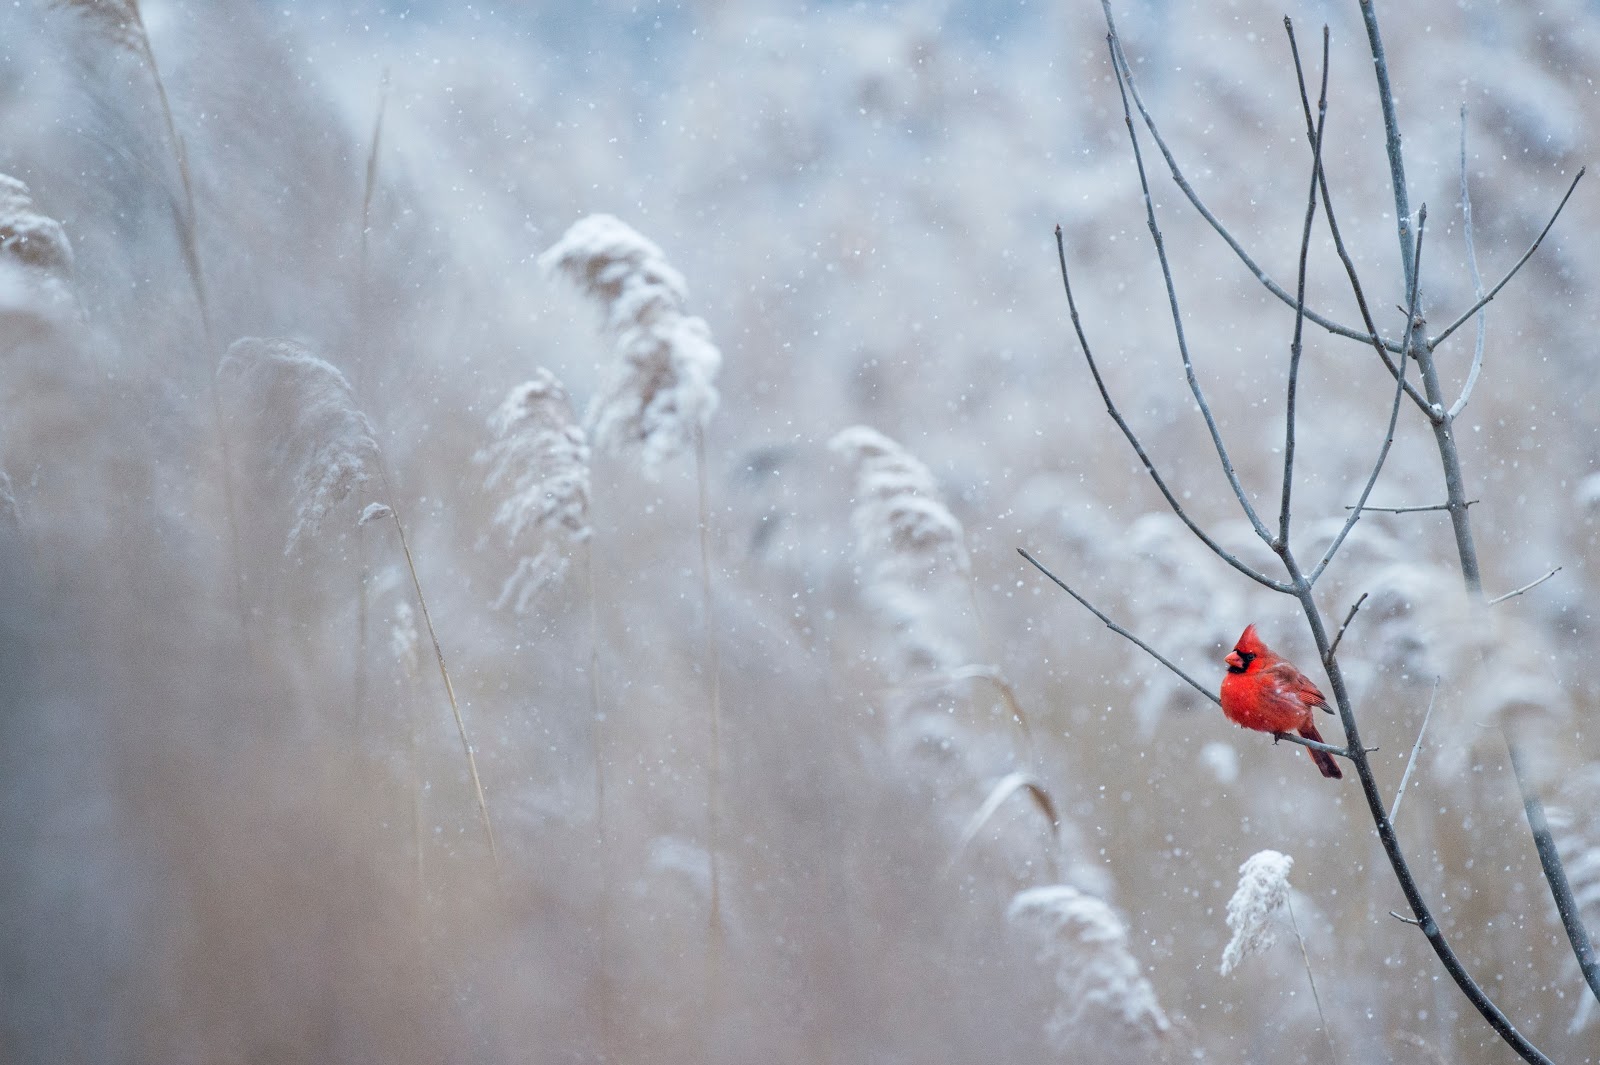
Photo credit: Ray Hennessy on Unsplash
Now that you know which settings to use and how to keep your gear safe in winter weather, here are some winter photography ideas to inspire you to get out and start shooting.
- Photograph falling snow – It’s true what they say—every snowflake is unique, as is every single snowstorm. Head out in the snow to play with your shutter speed. Slow it down to capture streaks of white, or stop the motion to capture each snowflake in your scene.
- Sunrise/sunsets – Late sunrises and early sunsets make it easier to get outside during the golden hour. Combined with the warm winter lighting, soft reflections, and clear atmospheric conditions, and you have the ingredients for some amazing sunrises and sunsets.
- Holiday lights – Light displays can be a backdrop for some very creative shots, whether you’re shooting portraits, cityscapes, or close-ups of your Christmas tree.
- Shadows – Take a walk in the woods on a bright winter day to capture the shadowy patterns falling across the blankets of snow.
- Frost – Early-morning frost can be found on foliage and window panes—perfect for macro photography or capturing abstract patterns.
- Winter Birds – As far as wildlife goes, winter birds are very accessible. Put up a winter bird feeder and practice capturing its visitors. All you need is a zoom lens and a sturdy tripod to become a wildlife photographer.
Recommended Gear for Winter Photography
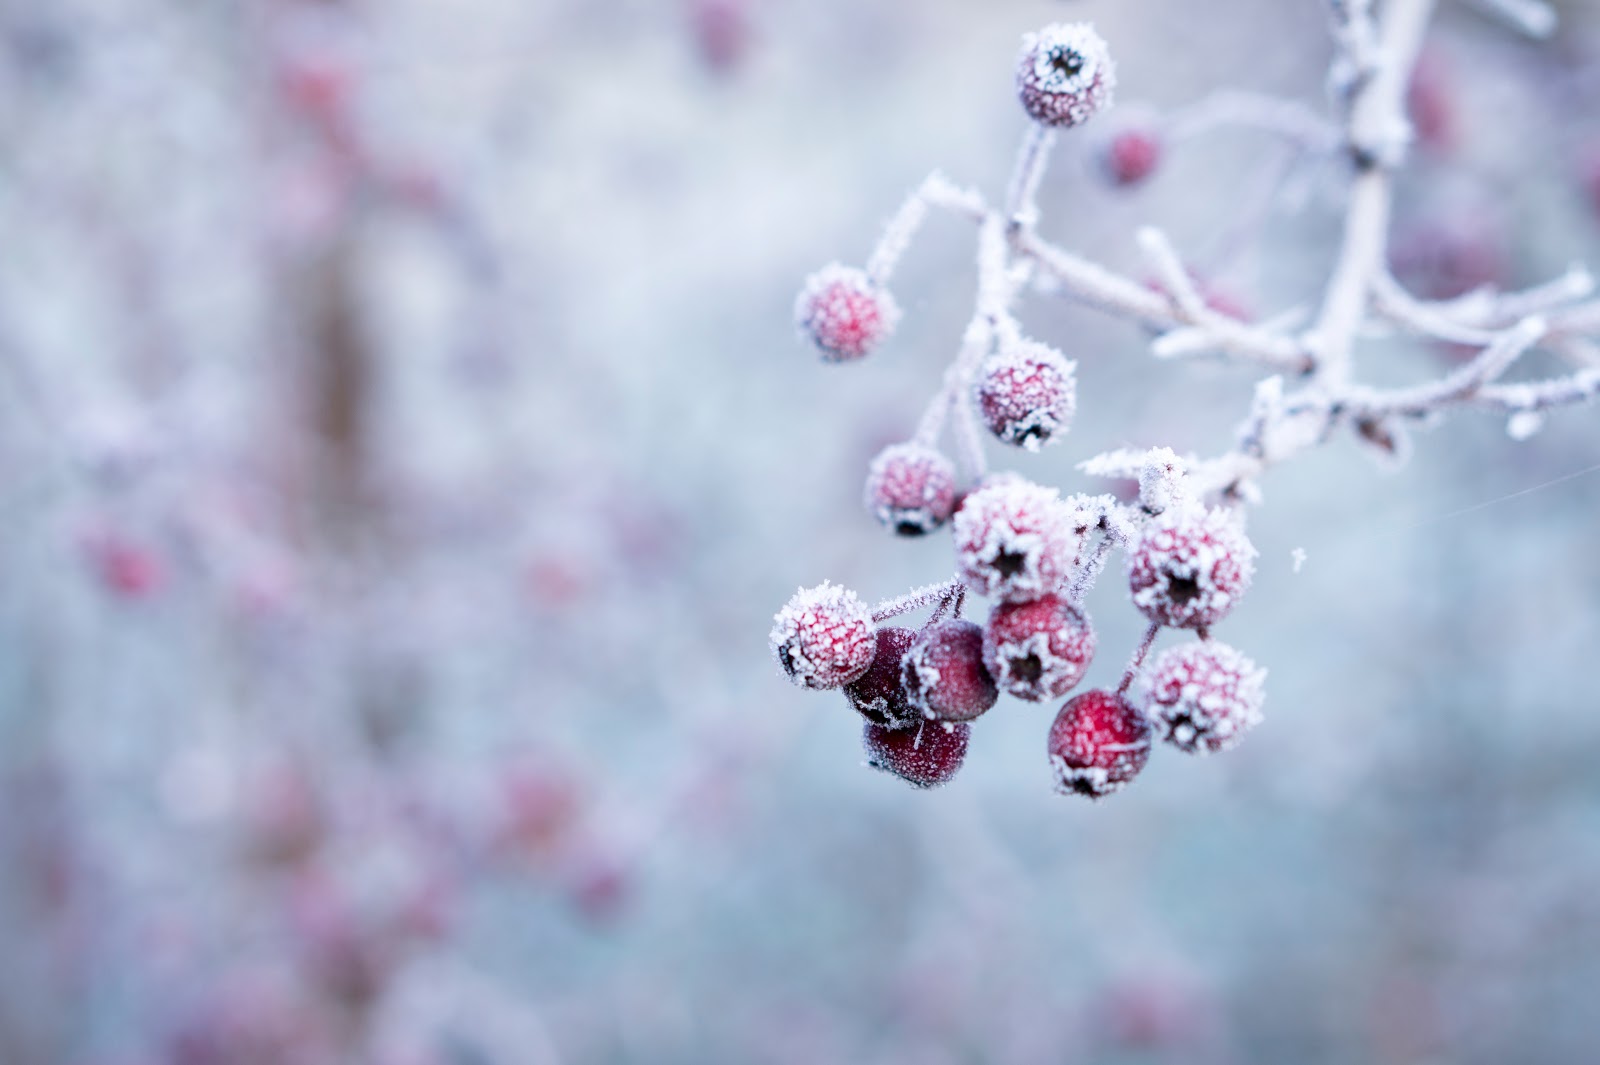
Photo credit: Galina on Unsplash
Aside from your camera and lenses, your winter photography kit should also include some essentials for keeping you warm and your gear dry. Here are some recommendations:
Gear to Help You Stay Warm
- Sturdy insulated boots – Warm them up before putting them on, and if it’s really cold, slip some insole foot warmers inside for up to eight hours of warmth.
- Wool socks
- Thermal base layers
- Traction cleats – These slip over your boots for easy walking on icy surfaces.
- Hand warmers
- Touchscreen gloves
- Waterproof over-mittens
- Balaclava – To prevent frosty breath from building up on your LCD screen.
- A warm hat
- Waterproof coat
- Snow pants
- Snacks and water
- Portable first aid kit and emergency firestarter
- Fully-charged cell phone – Keep this in an inner pocket so you don’t drain the battery.
Winter Photography Gear
- A waterproof camera bag – Your camera bag should be easy to get into and 100% waterproof. The K&F Concept large capacity backpack comes with a dust-free rain cover, anti-theft zip pockets, and a shockproof design—perfect for photo shoots in all types of weather.
- A carbon or graphite tripod – Metal tripods are hard to work with during the winter because they become so cold. A carbon fiber tripod will be lighter for easy transport, and your hands won’t freeze while you’re setting it up. If you do shoot with a metal tripod, consider buying tripod leg warmers to keep your hands from getting too cold. Also, make sure you have a quick release plate on your camera so you don’t have to screw and unscrew it from your tripod with cold fingers.
- A rain cover – You can certainly shoot with your camera inside a plastic bag, but a dedicated rain cover will be much easier to use. Peak Design makes shells in three sizes to protect your camera from rain, snow, and dust while out in the field.
- A polarizing filter – A polarizer is useful for shooting outdoors in bright sunlight and snowy conditions. It will reduce glare and reflections while adding contrast to your shots. Polarizing filters come in different sizes and screw onto the front of your lens.
- A camera-cleaning kit – Aside from a small towel and some microfiber cloths to wipe down your lens, you should also carry Q-tips for cleaning your viewfinder, a lens brush for brushing away snow, and a small blower. Don’t ever breathe on your camera to clean it — you will only add moisture to the lens and elements.
Now Go Out and Start Shooting!
Winter is a spectacular time to experiment and grow as a photographer. Extreme weather, beautiful lighting, and of course snow, set the stage for some magical shots and enable you to play with your camera settings, composition, and techniques.
The challenges of winter photography—staying warm, protecting your gear, and shooting properly exposed images can all be overcome with preparedness and practice.
10 Tips to SELL Your Used Camera Gear FAST